Tuesday, January 14, 2014

Your Happy Place - student examples

Assignment #1: Now - Life in 2014

Assignment #1: Now - Life in 2014

The greatest failure is the fear to fail.                                                                                                                                                        – Duane Michals

When you paint, you begin with a white canvas and add elements to build up your image. When you take a photo, you begin with chaos and remove elements from your scene using the creative tools that the camera affords to reduce the scene to your liking. These are very different processes.

Garry Winogrand said, "I photograph to find out what something will look like photographed." 
For this first assignment, you are going to focus (pun intended) on photographic vision and how things look photographed. How do things look through the camera? Do your images match what you envisioned? What creative tools are at your disposable to manipulate the scene?

In order to facilitate that, I am setting up some parameters. For your first roll of film, I would like you to make at least a few photos that could only be taken now. This is to say, they must represent contemporary life in some manner. A guy bicycling while texting would be a good example. Zipcars, electric cars, cafes full of people on their laptops, people walking around with headphones everywhere, etc… Think about fashion, hairstyles, hobbies, drones, etc.. Really, the choices are infinite. 

Ultimately, you will take at least 4 images for this assignment that you feel really good about. We will have a look at some of them on Tuesday, January 21. The final critique of the Assignment will be a few weeks later).

Have fun, be creative, and see how far you can push your creativity. Experiment with camera angle, camera position, distance, lighting, time of day, color, lens, shutter speed, aperture, composition, mood, drama, etc. Just be sure you have enough light for proper exposures. Pay attention to the entire frame and aim to create images that are both visually interesting and communicate something about your subject. These photos may be shot indoors or outdoors, or both, but if you shoot indoors, be sure you have enough light to shoot handheld (otherwise use a tripod or use a higher ISO). Plan to explore this theme over a period of time - do not shoot this the day before it’s due!

The trick to this assignment is to meet the requirements of the assignment while still making interesting images. Anyone can go take a photo of a fancy solar powered parking meter. How can you do it an make it interesting?

People should be able to look at your photos and tell they were taken around 2014. 

Suggestions:
  • Move away from, and close to, different parts of your subject (physically or through focal length changes)
  • Consider figure/ ground relationships and focus on different parts of the scene to change emphasis
  • Shoot at eye level, crouch down, stand on a ladder, lie on the ground, turn and face different directions
  • Vary the placement of your subject within the frame/ play with the composition in various ways
  • Experiment with different aperture settings and shutter speeds (use a tripod when necessary)
  • Shoot in morning, afternoon, evening & in various weather conditions for different effects
  • Pay attention to the lighting and the mood it creates!  
  • Use props or dress up as necessary. 
  • Recruit your friends to help you.  
  • Look at photos taken from earlier generations. What do you notice?  
Technical Notes:

For this first outing, I suggested that you start with your ISO at 400. This 'medium speed' ISO will insure that you have a better chance of being able to get a sharp image in lower light conditions.
Begin with your shutter speed at 1/60. Adjust your aperture in order to get the meter to indicate a correct exposure (usually this is by indicating a marker at 0 on a numerical scale visible through the viewfinder). If it nice outside, you should be able to to this with no problem. If you find that you don't have enough light (you can't get it to out of the - numbers to read 0) even with the aperture at its largest (numerically lowest number), then you should increase your ISO until the meter indicates a correct exposure. Remember you must use 1/60 or faster when hand holding the camera.

If you camera supports shooting RAW files, then RAW + JPEGs for this assignment.

Be sure the date and time are set correctly in your camera. 

Daily Photo Assignment

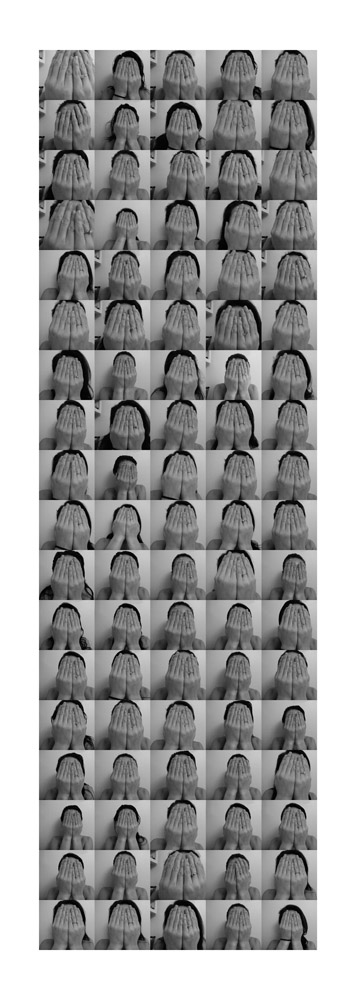
Your first (and in a way your last project) is to take a photo everyday that will ultimately be assembled into a grid as well as a video. Yes, every single day from today until the end of class (You have until Friday to start the project so that you have some time to think about it). This will result in approximately 100 photos. You must upload them to Flickr once a week so that I can monitor your progress.  By Monday evening, post what you shot for the week to Flickr.

You might try a series in which you plan your movement over the entire series. Imagine the hands of clock ticking, running it place, slowly forming a smile, watching something grow, watching something decay, how your bed looks every morning, each night while you sleep, etc...


NOTE: Every semester, someone fails to keep up with this assignment. Please do not try to pull a fast one and shoot 100 images on a single day and tell me that one was taken each day. It won't work. I can read the data from the files. Additionally, that would constitute academic dishonesty and I would be required to report it to the university.

It was inspired by Noah K's popular series of daily self portraits.

Video of a guy who took a self portrait everyday for 8 years.

What's due Tuesday, January 21


Homework:
  • sign up for a Flickr account
  • join the LHSP Winter 2014 Flickr group; please go to the LHSP Photo Winer 2014 Flickr Group and request to Join the Group
  • begin your Daily Photo project by Friday; upload your Daily Photos to Flickr by Monday night
  • begin shooting for the Now: Life in 2014 assignment; upload at least 20 images for the Now: Life in 2014 assignment to Flickr by Monday night
  • read Chapter 1 & 2 from The digital SLR guide : beyond point-and-shoot digital photography by Jon Canfield (see below on how to access the reading)
  • read/skim your camera's instruction manual (I know you won't understand it all, but it will at least make you aware of your camera's features)


READING HOMEWORK

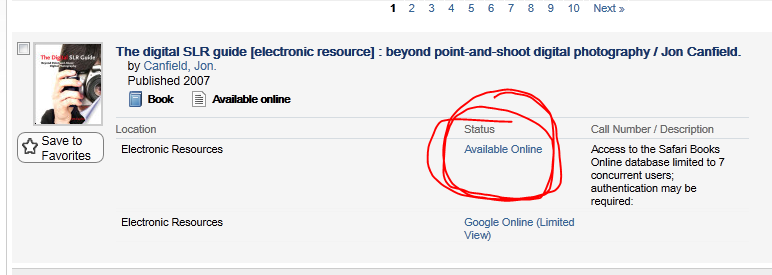
Before next class, I would like you to read Chapter 1 & 2 from The digital SLR guide : beyond point-and-shoot digital photography by Jon Canfield. The chapters are short and it won't take you too long to read them. This book if available online through UM's library. Just go the the Mirlyn Catalog home page and search for the title. Click the link where is says Available Online and it will open the book in a new tab.

If you don't have a DSLR, the reading will help you to understand the advantages that they offer over most compact cameras. Any camera that offer manual exposure capabilities would be fine for class though. Stated another way, any camera that allows you to control the shutter speed independently of the aperture would be appropriate for class.

If you are inclined to purchase a DSLR, I would suggest that you begin with an entry level DSLR kit by Canon or Nikon that includes a basic zoom lens. Good candidates would be the Canon T3, T3i, or T4i or the Nikon D3200 or D5200. If you do some research and want some additional advice on purchasing a camera, please don't hesitate to email me. That being said, you don't have to purchase a camera as long as you are okay with checking one out from LSA Media services to complete the assignments for which they are necessary.

Please bring your laptop, camera, and camera instruction manual to each class.

Saturday, April 27, 2013

Videos from Daily Photos

From LHSP students- Winter 2013
Erich
Danny
Rona
SoYun

Carly F
Amelia
Rachel
Kristen
David
Laura
Sara
Ajay
Kelsey
Jamie
Beth
Nisreen
Raquel
Mark

From a different class

Murilo

Kelsi

Kayla

Casey

Crystal

Kim

Abhishek

Drew

Eric

Dee

Hayley

Tony

Emily

Mike

Monday, April 15, 2013

Video series on how to assemble your Multi Faceted Personality image

I made a video series which covers the basics on how to assemble your image grid. I did it kind of fast, so the gaps in my resulting 'demo' image aren't perfect, but you will get the gist of it. You should be able to get perfect spacing on yours.

I will go through all this in class tonight (April 15 -tax day), but I made these to assist you assembling it outside of class if necessary. To re-cap, you just need the RAW images for class tonight - you don't need to attempt to assemble them as we will do that in class.

Video Part I

Video Part II

Video Part III

Video Part IV

Nice assortment of 'vintage look' actions

Blue Vintage filter that I used in the video. NOTE: It downloads as a .rar file and you have to have a program that can uncompress that. 7Zip is a free utility that opens and writes a number of compressed file formats included .rar. It is Windows only. Try RARExpander for Macs. Or just pick a different action that isn't saved as a .rar file!!


3x5 assemblage from Video with action applied

3x5 assemblage from Video without action applied

completed 5x11

complete 5x11 assemblage with selected action applied