Tuesday, April 15, 2014

Extra Credit Opportunity - Assemble all your daily photos into a perfect grid

A few students have requested extra credit opportunities. I am offering two such projects for extra credit. One would be to assemble all your daily photos into a single grid with perfect spacing by setting up a grid. This will require you to do some math to determine the size of the individual image and the final grid image. It wouldn't be adequate to just use the 'pixel shim' method for this. The instructions for this are below.


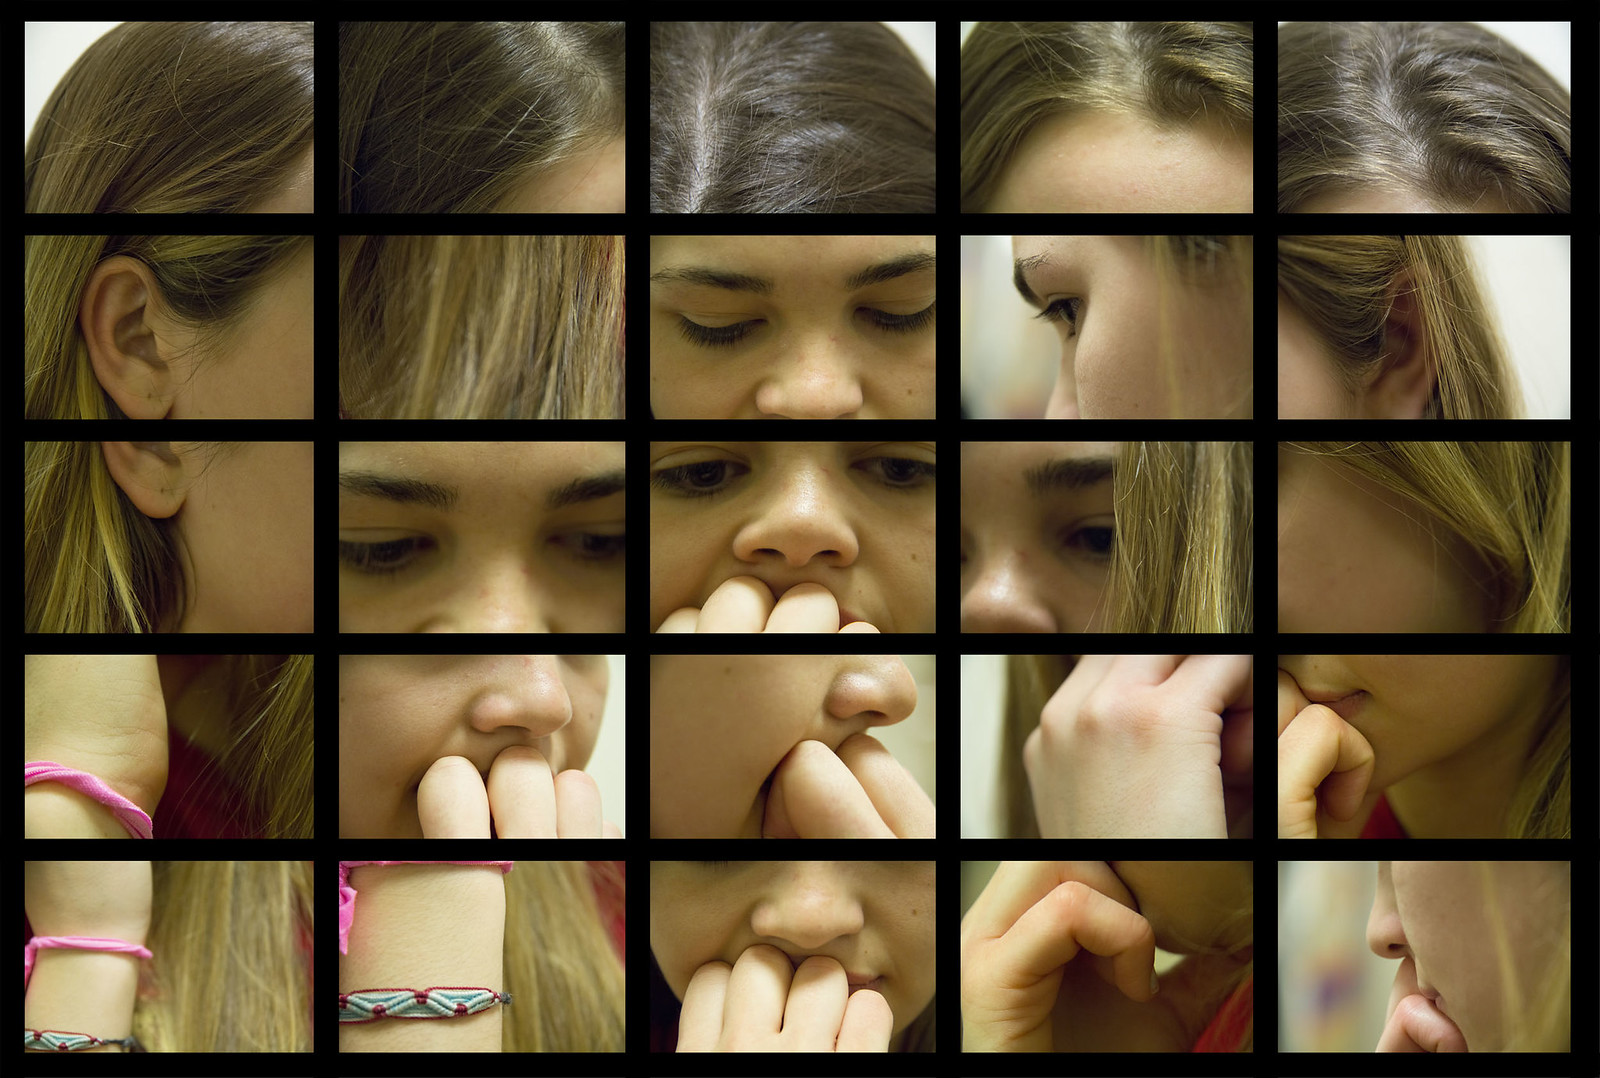
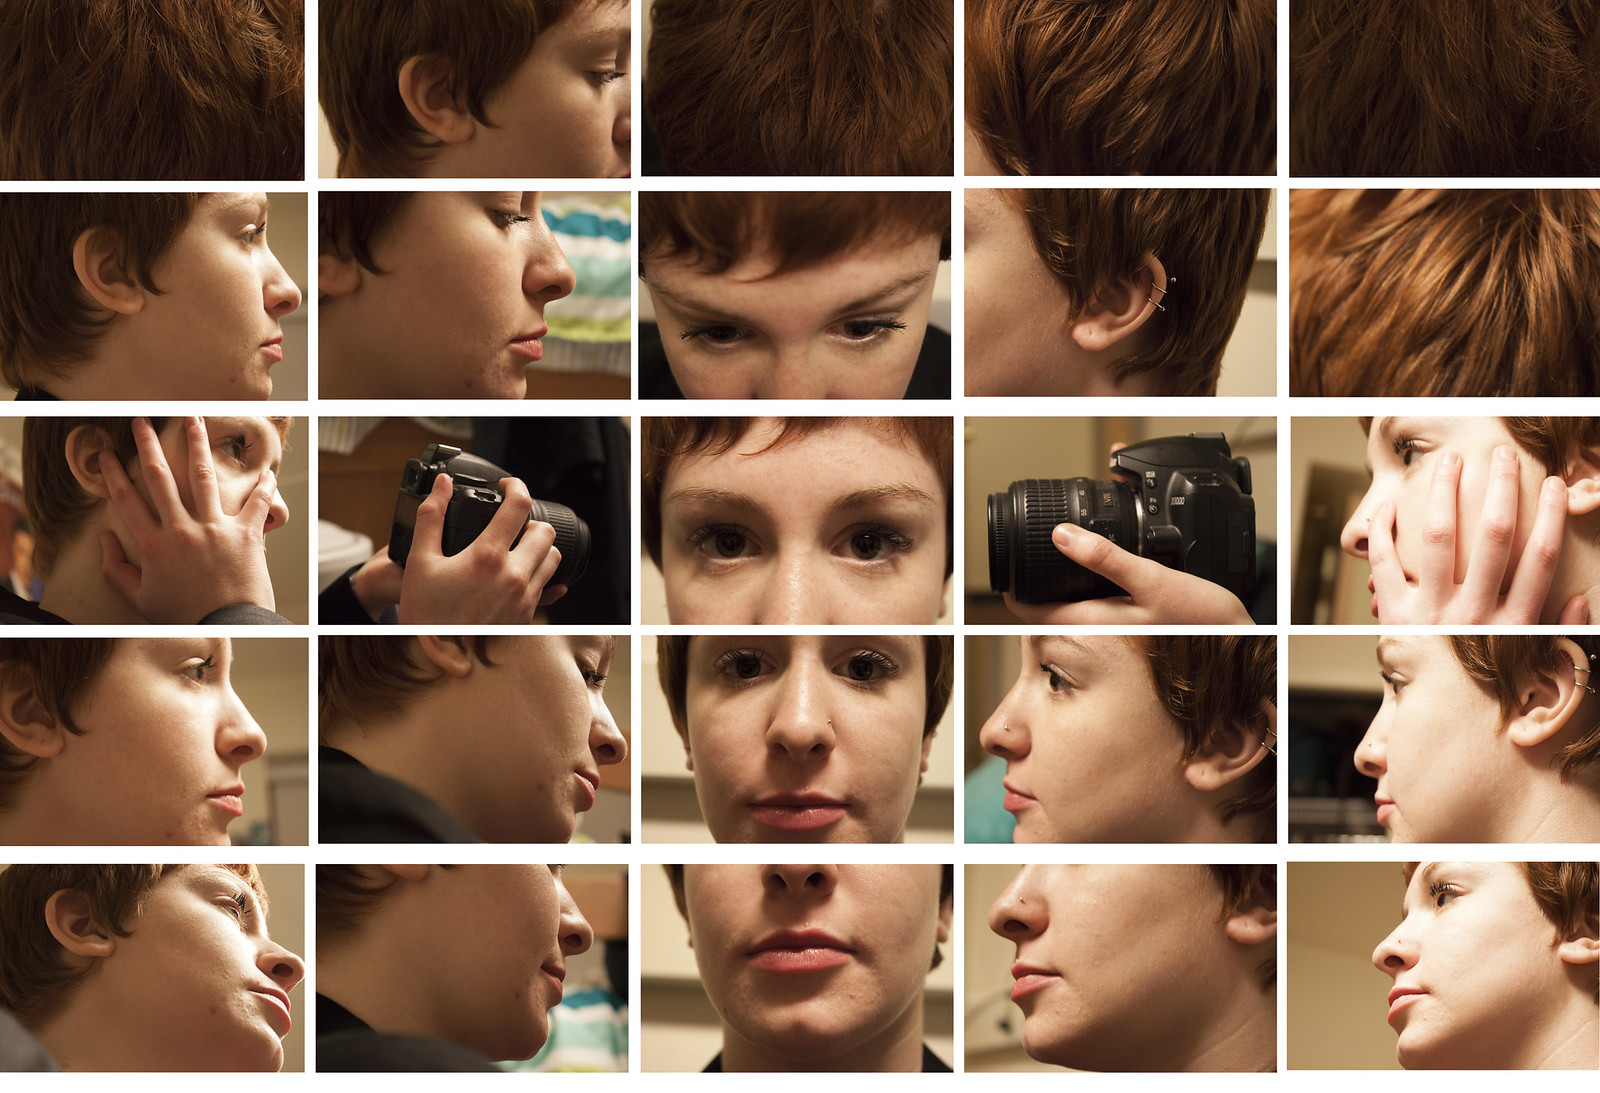
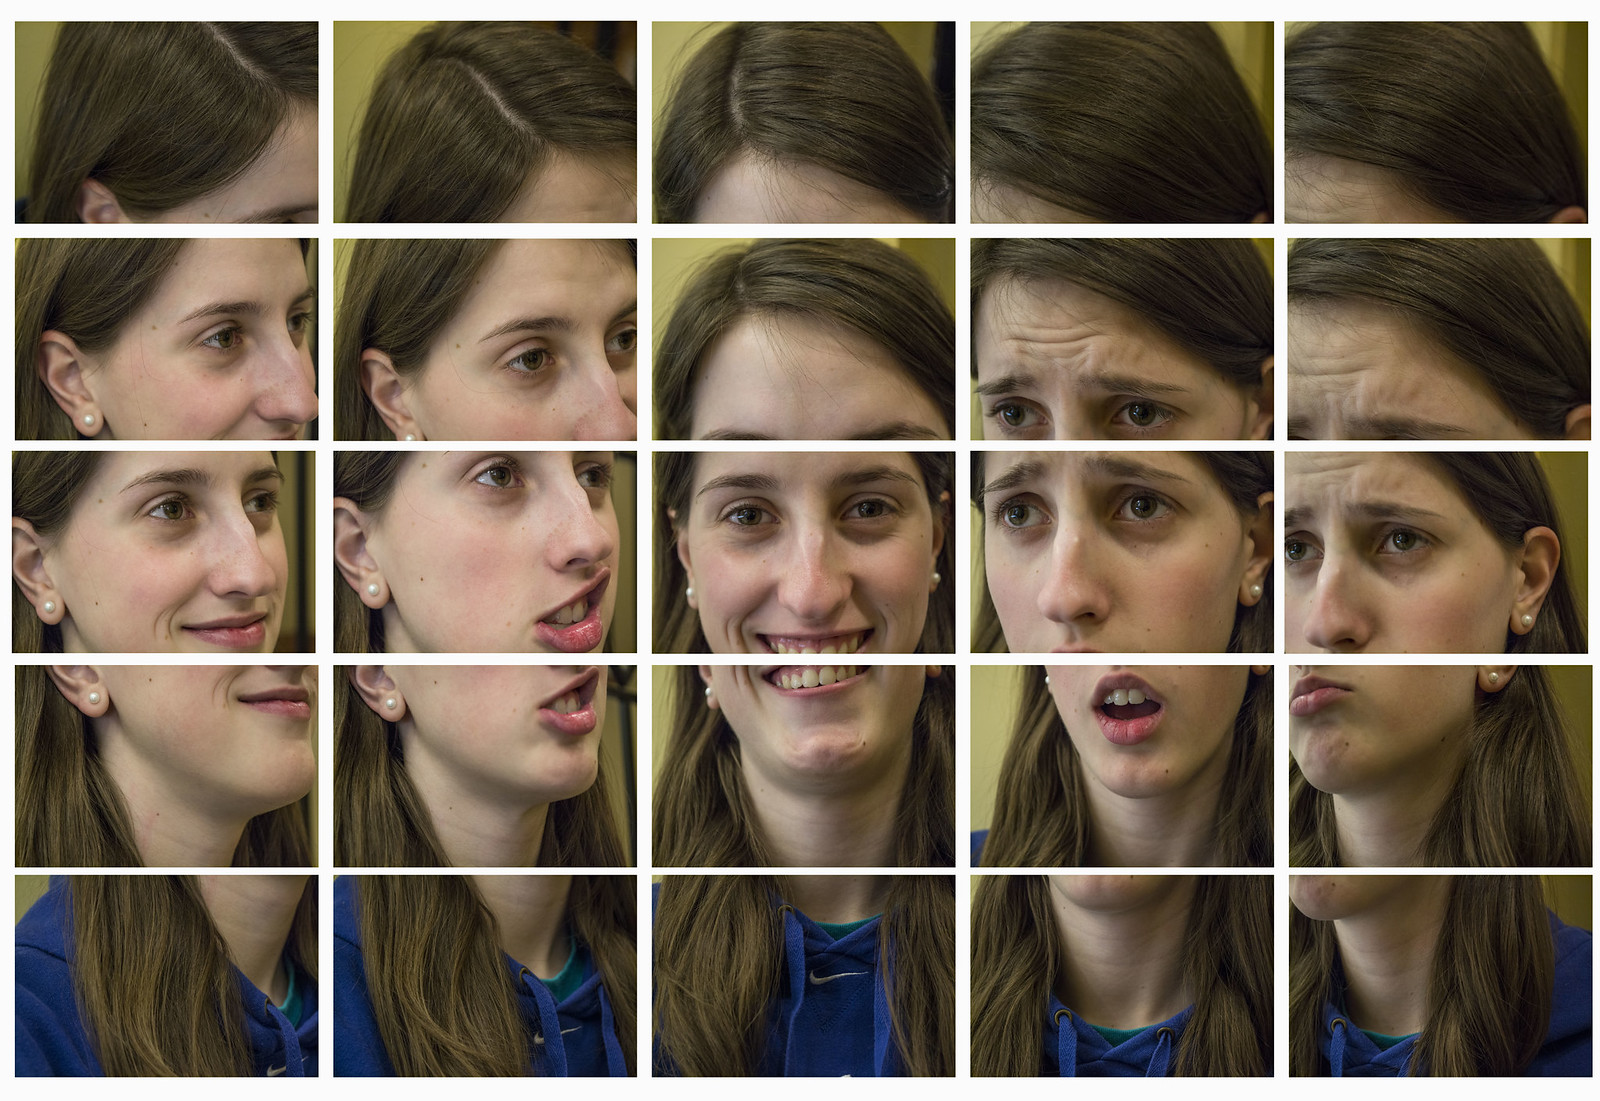
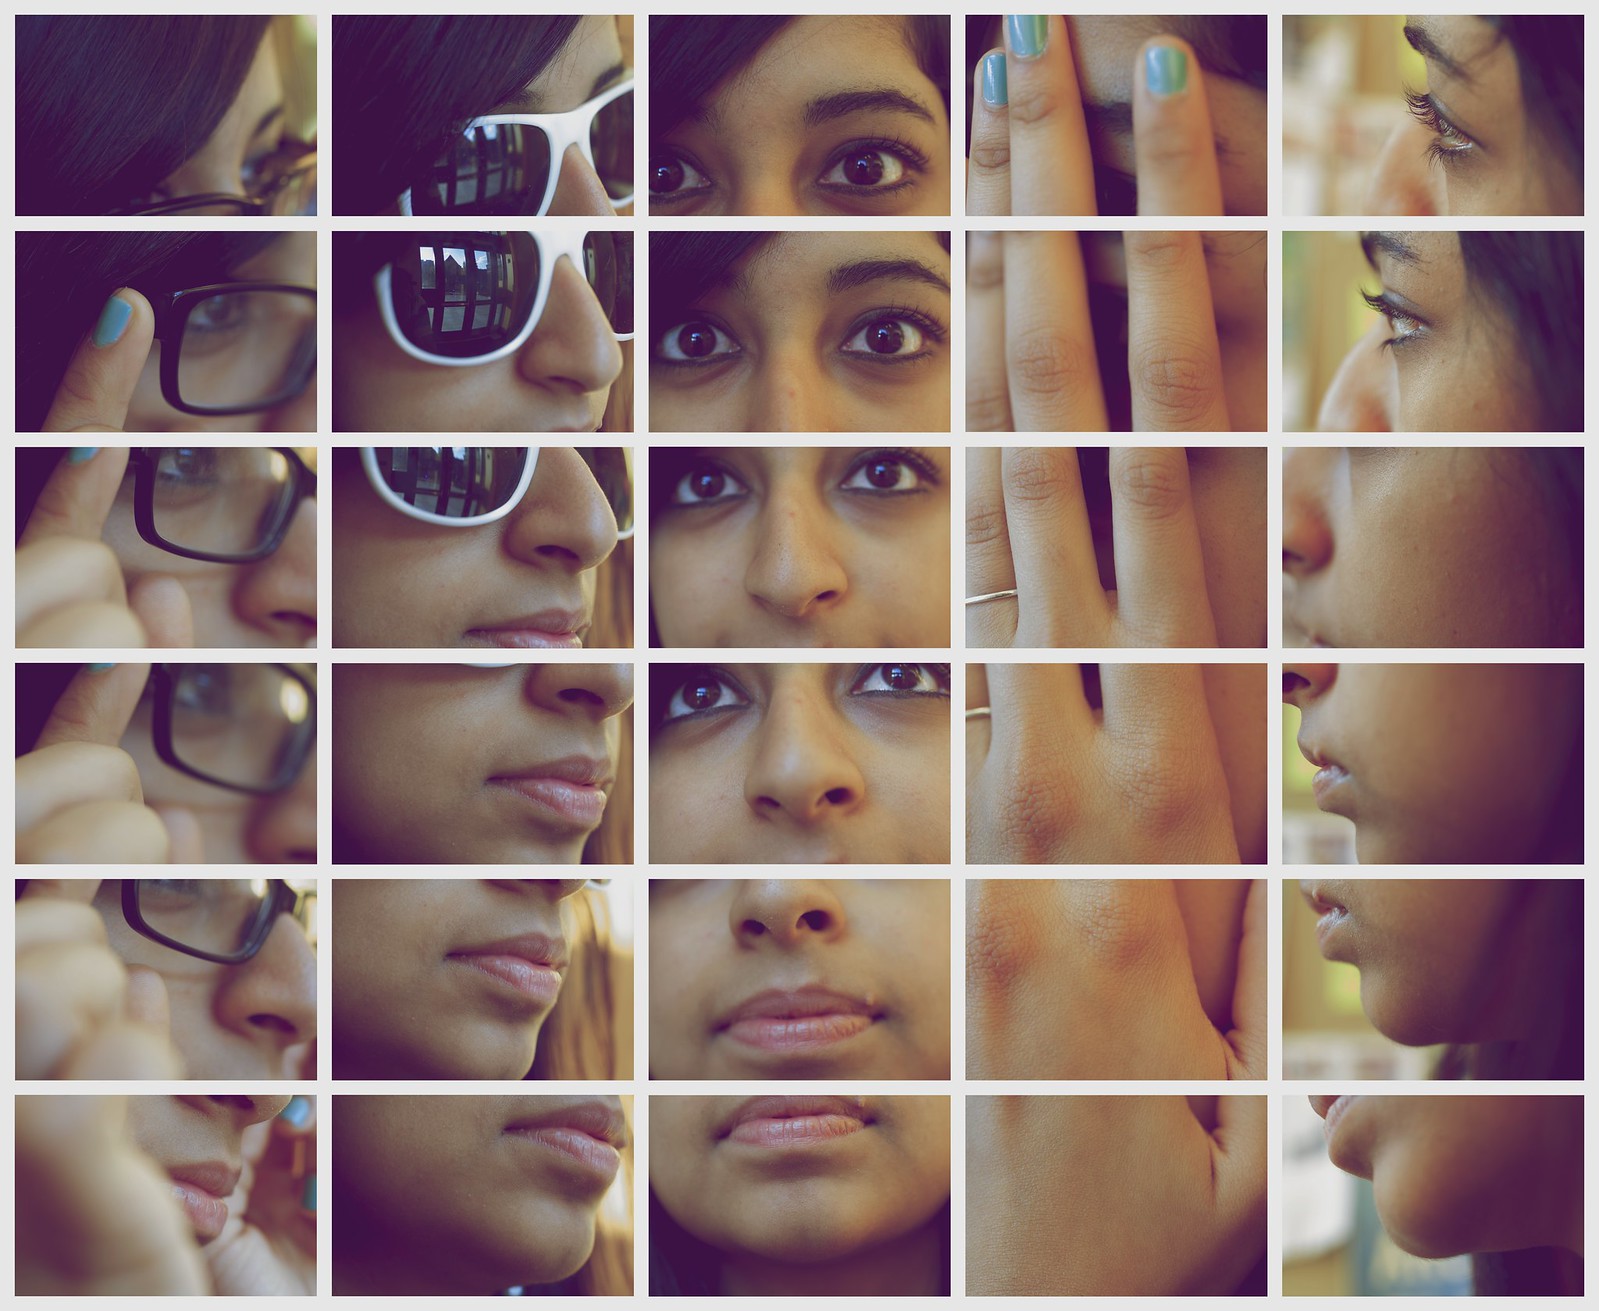
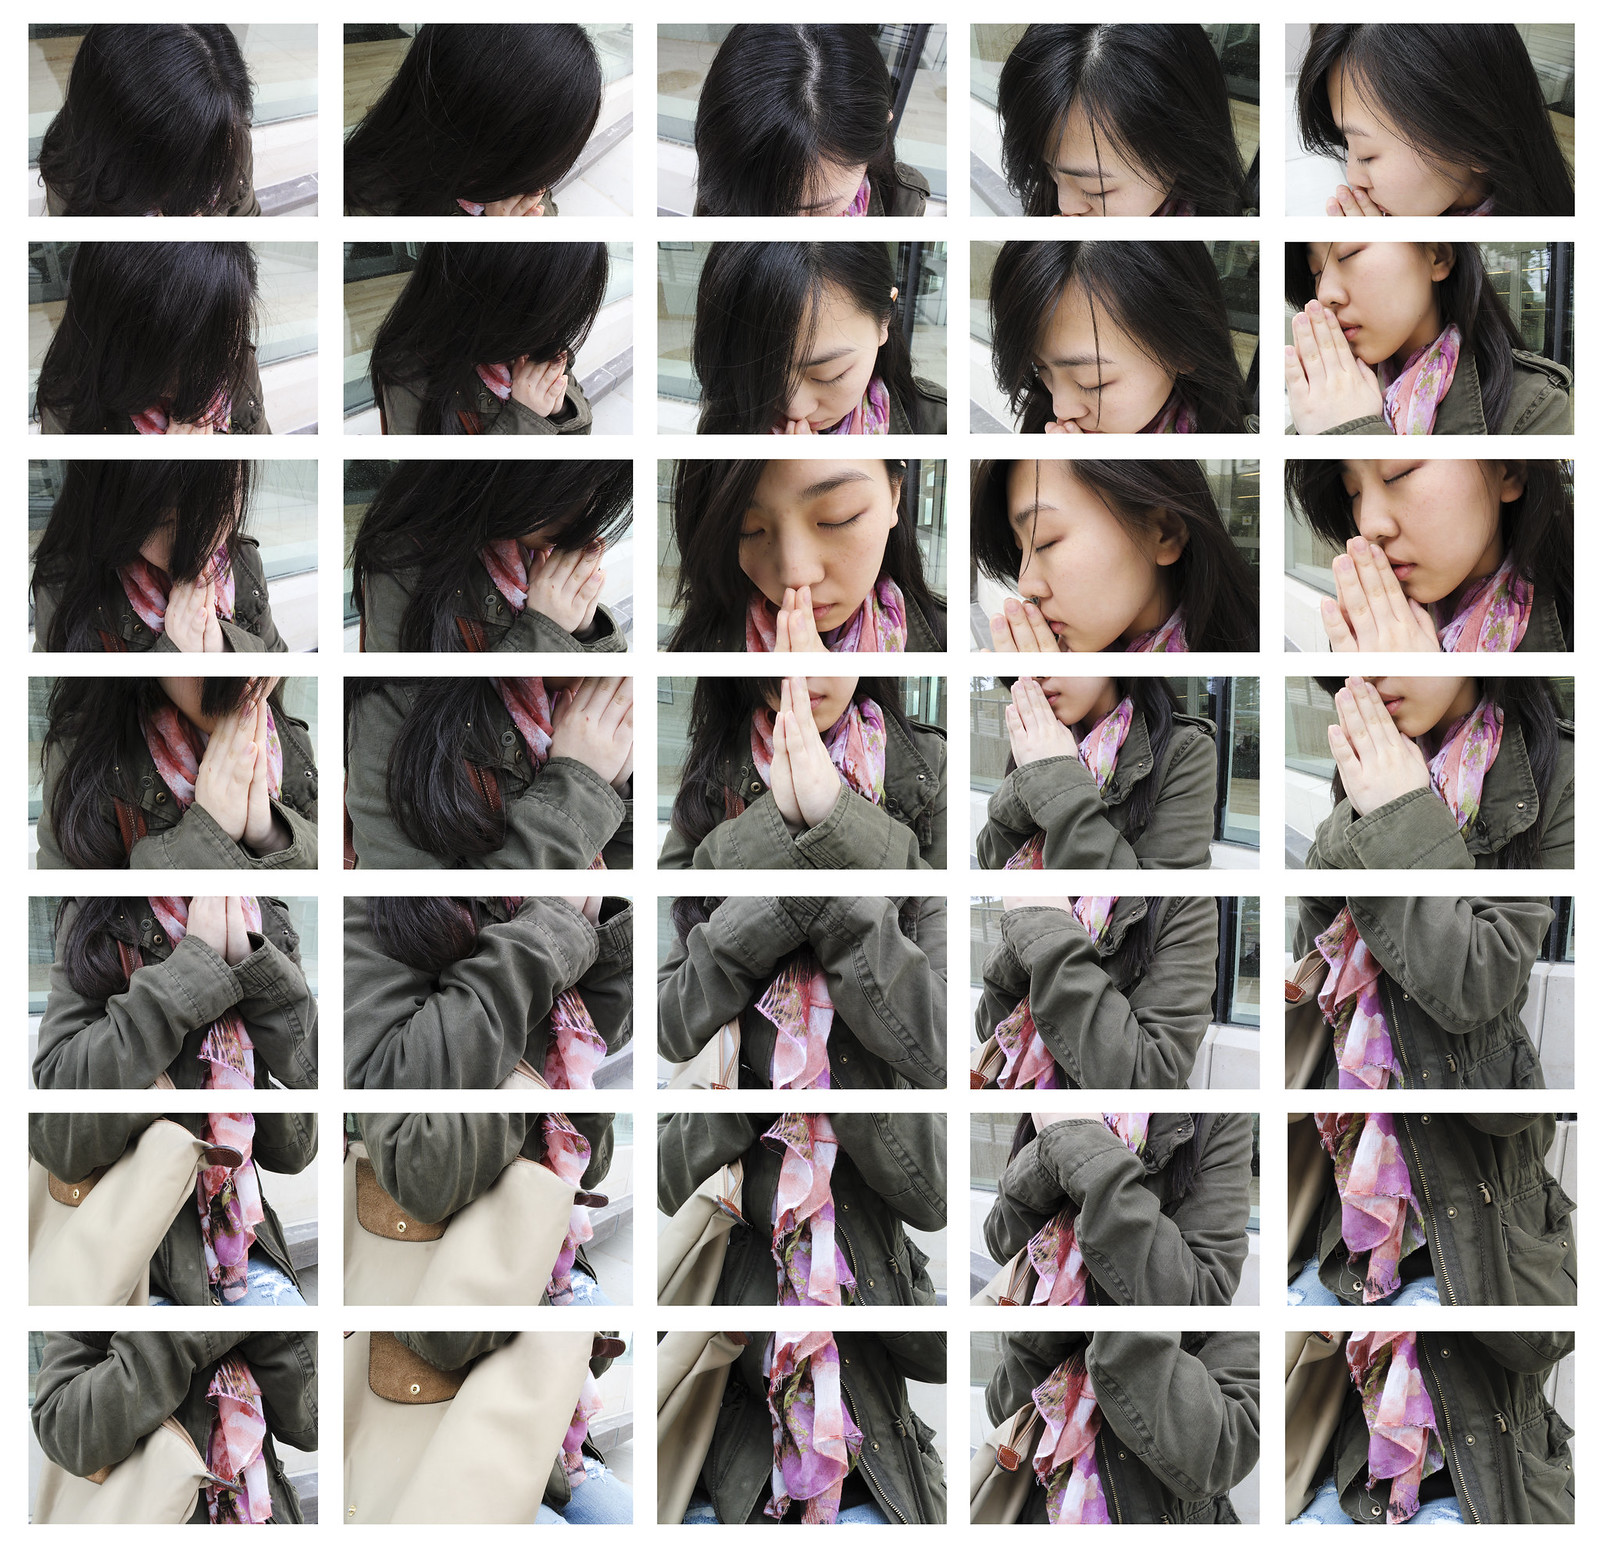
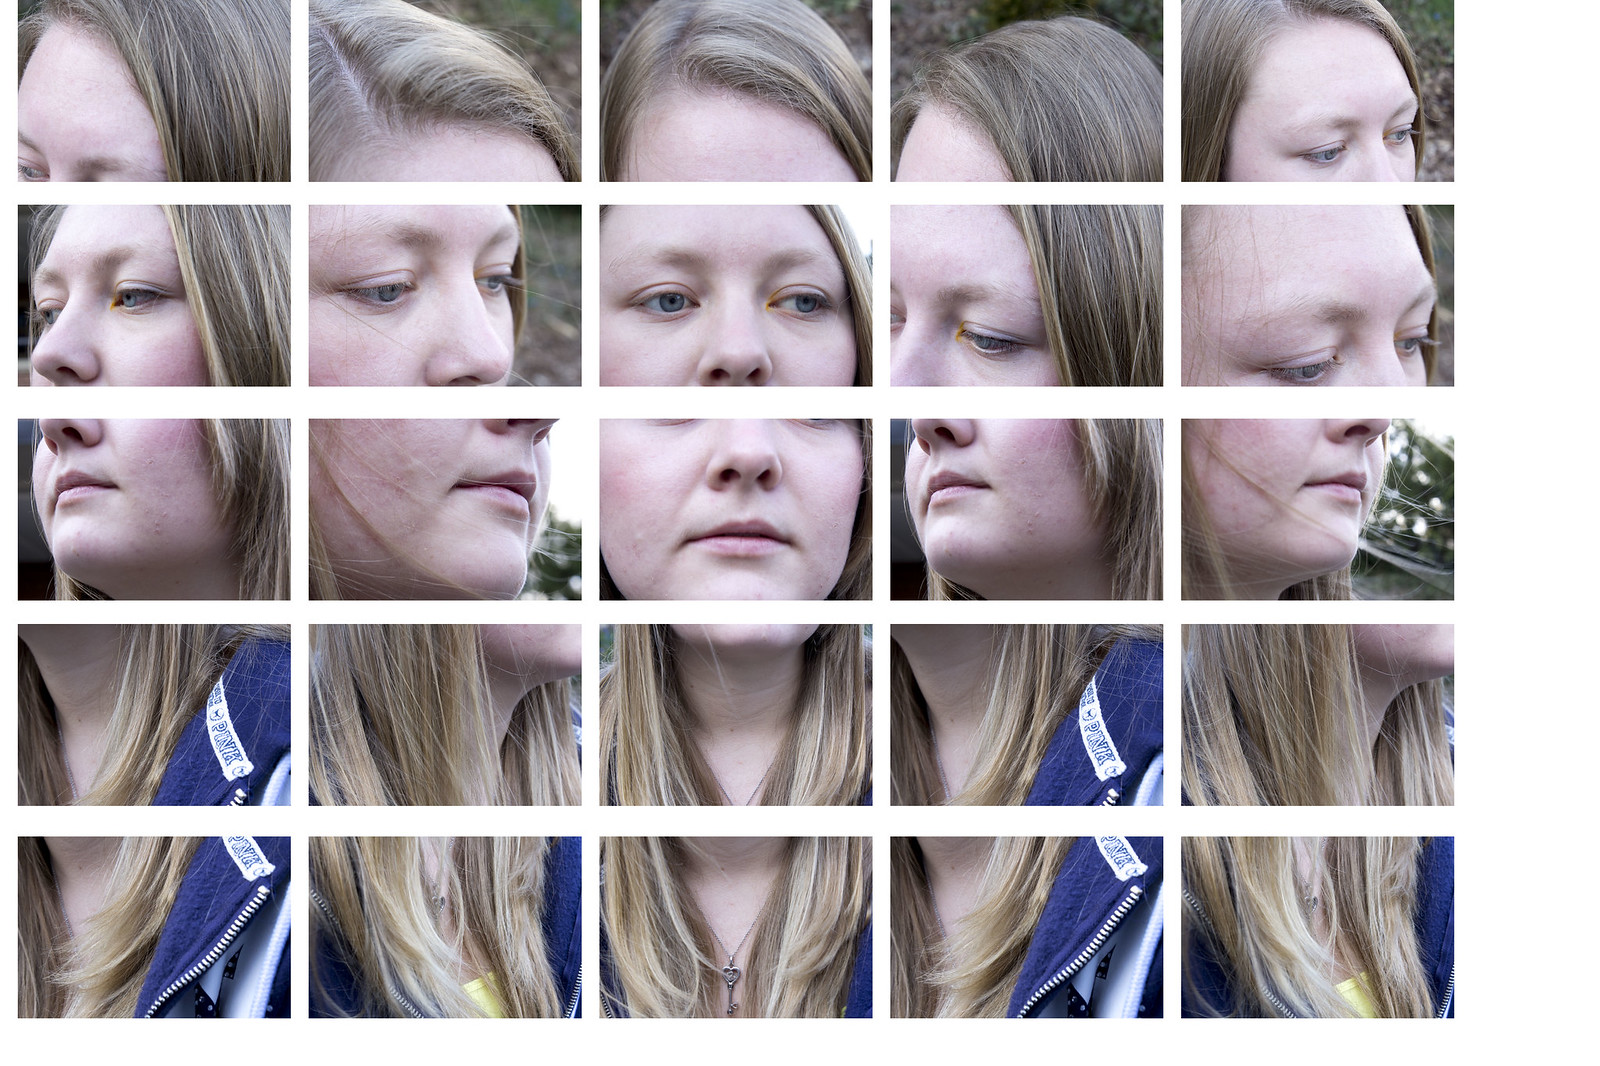
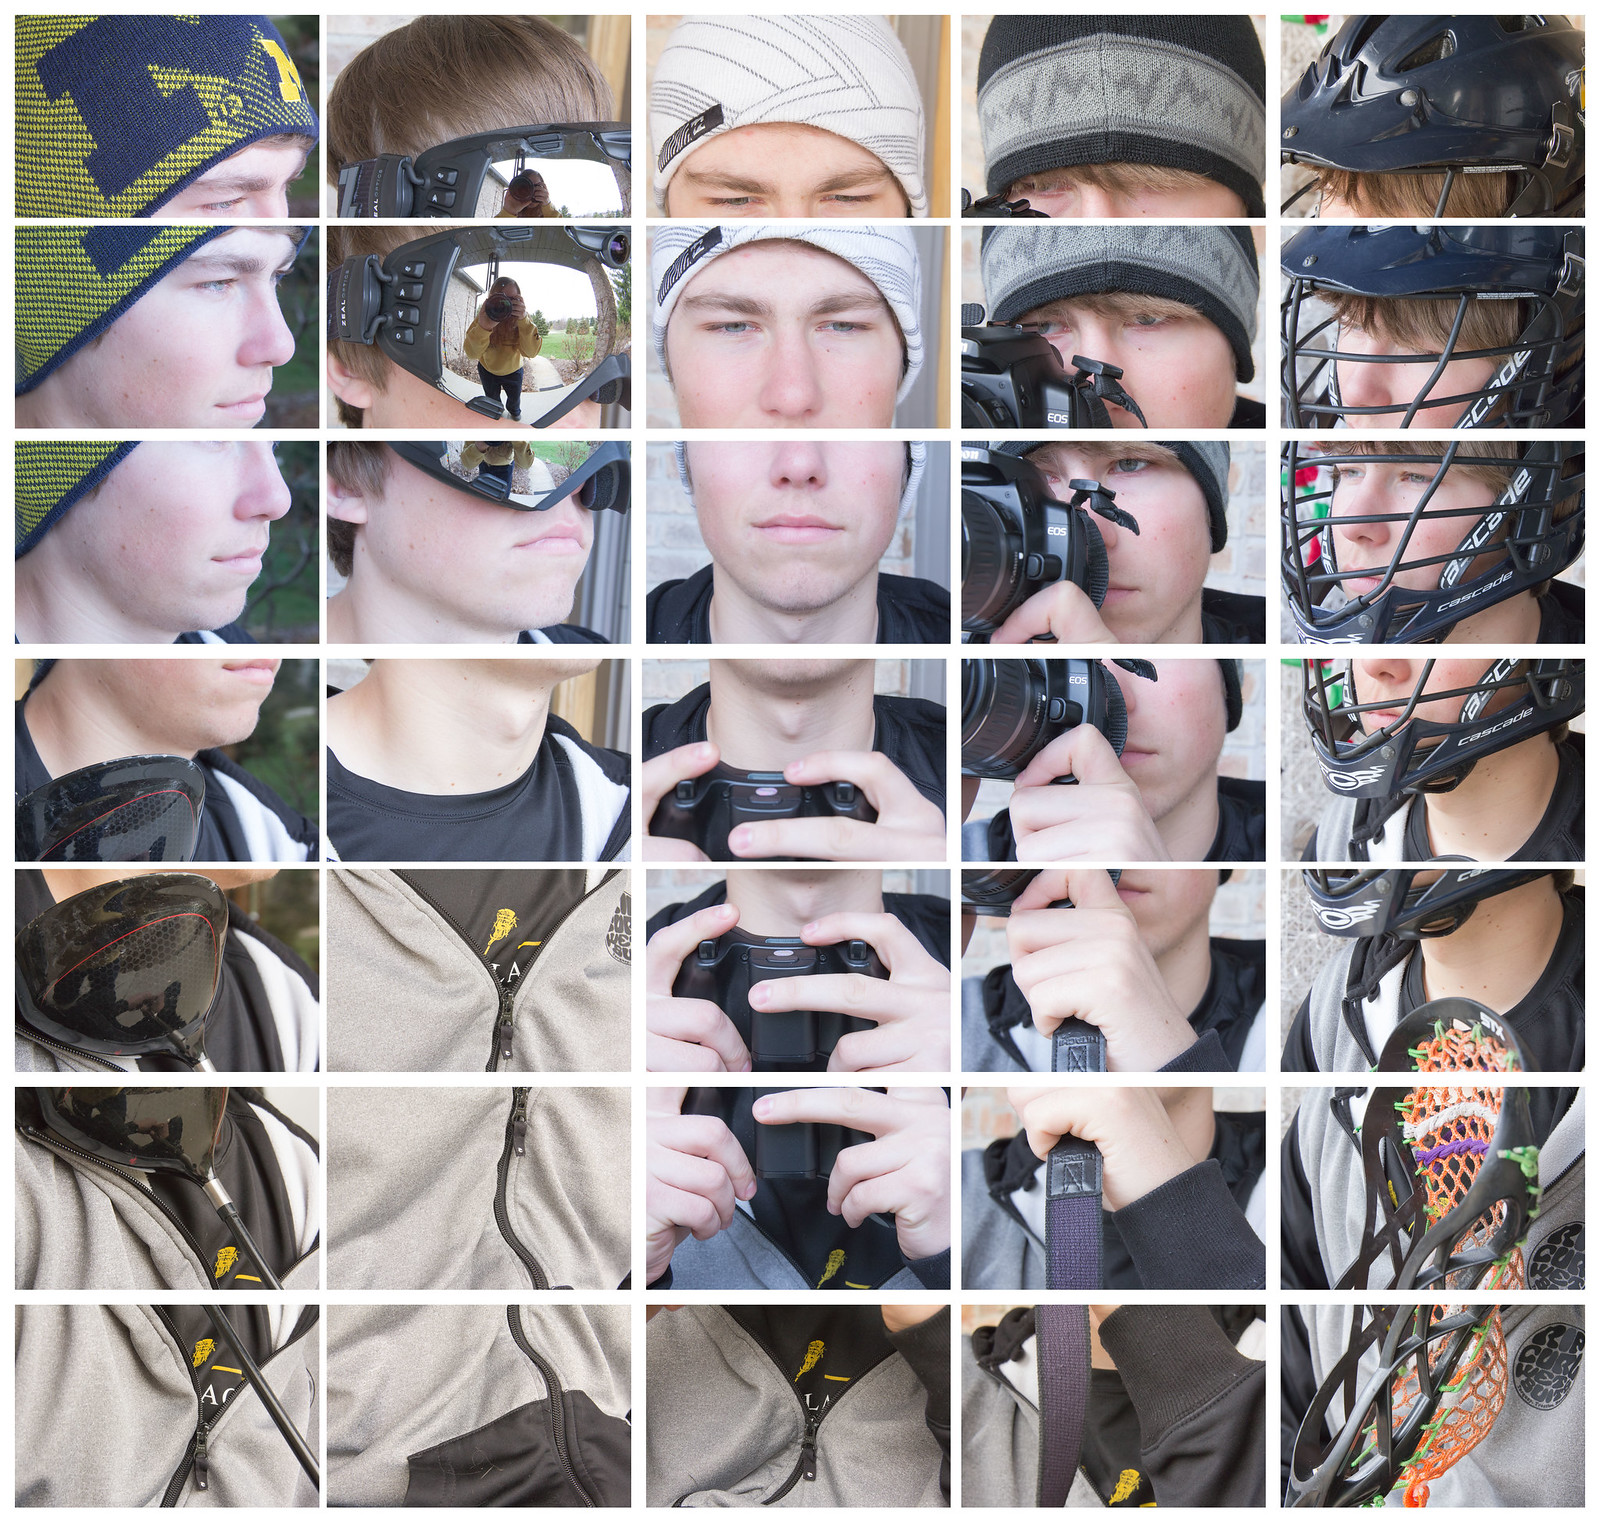
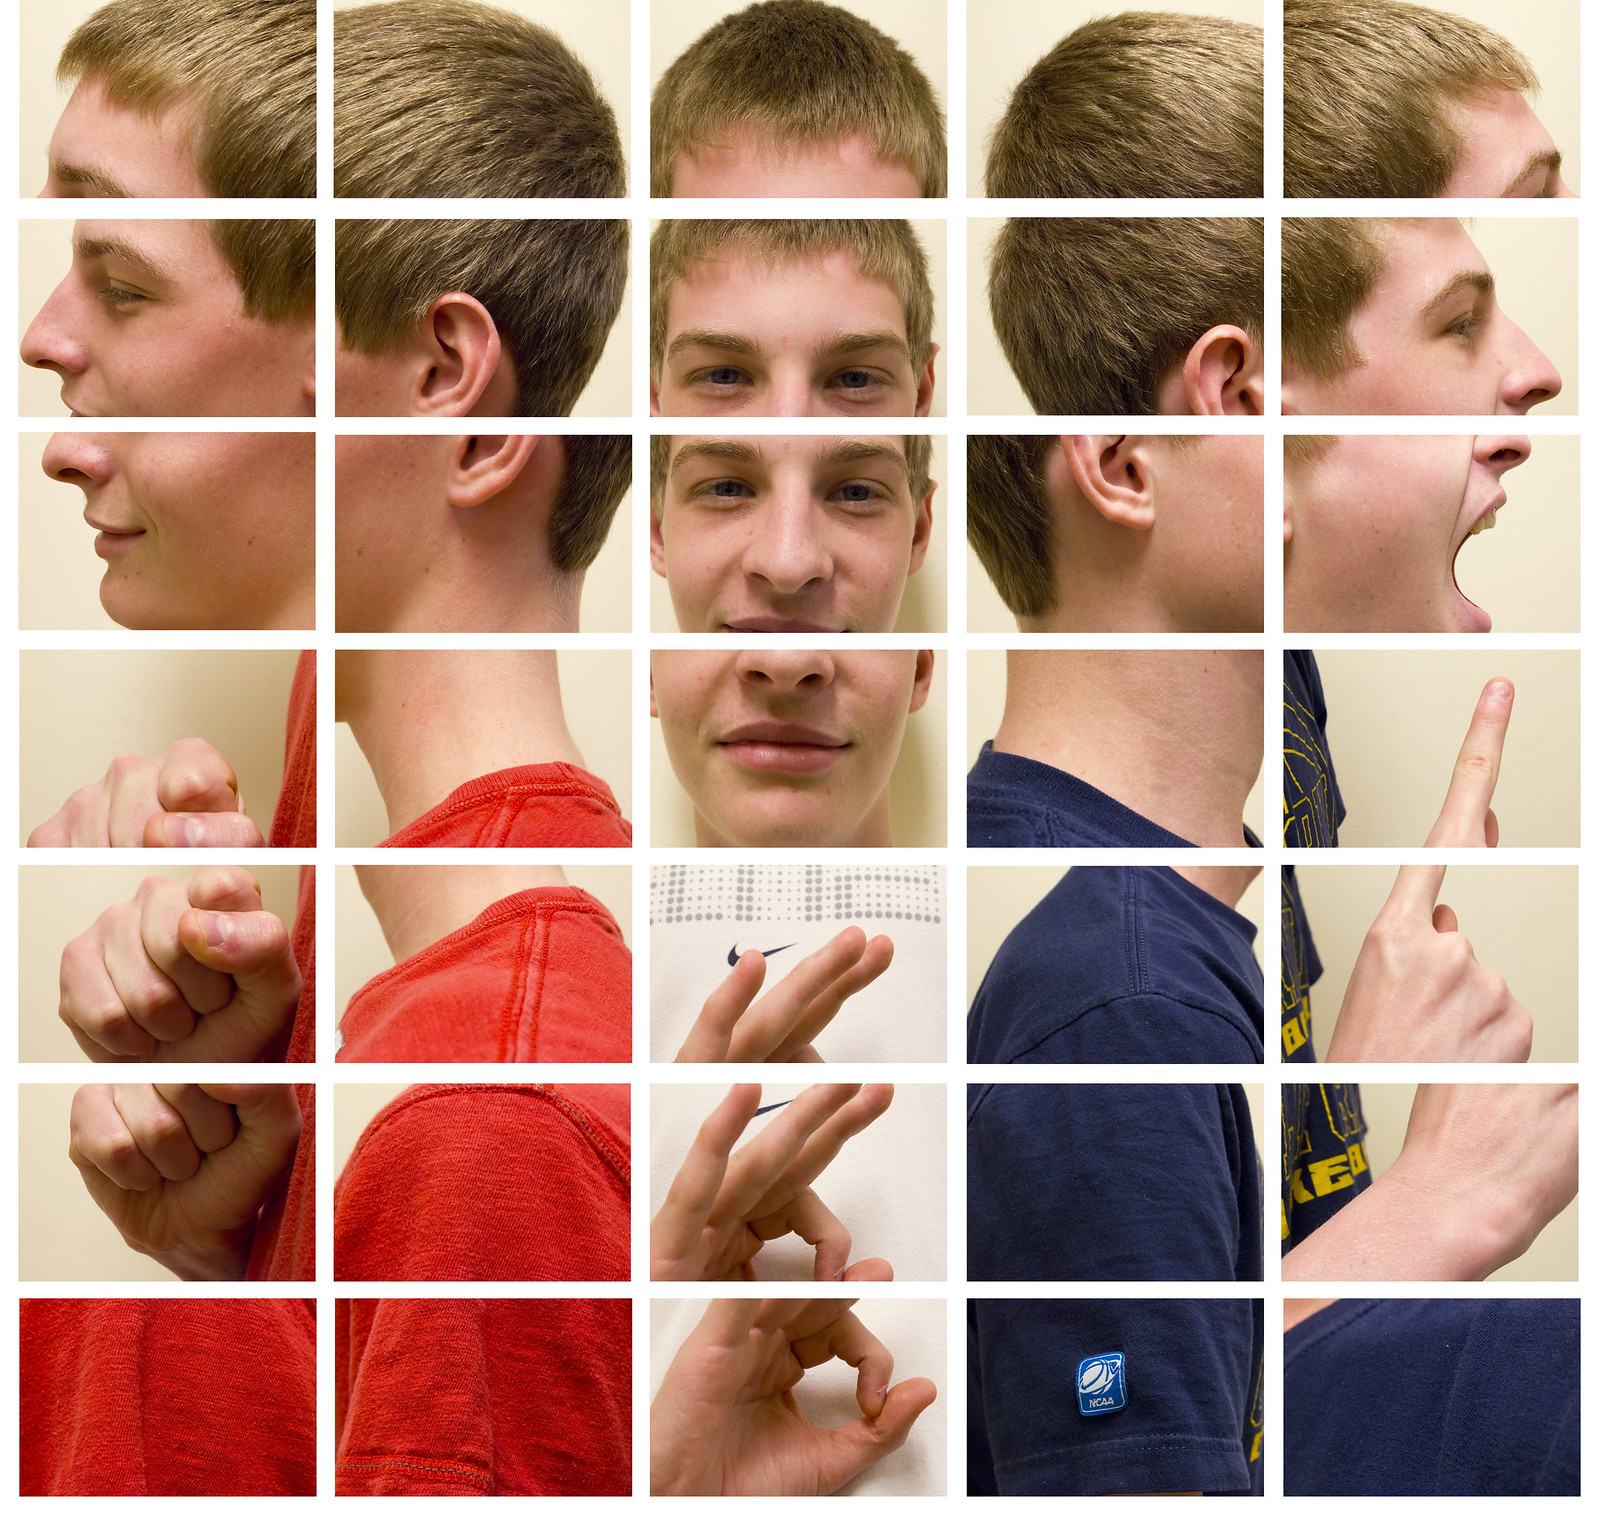
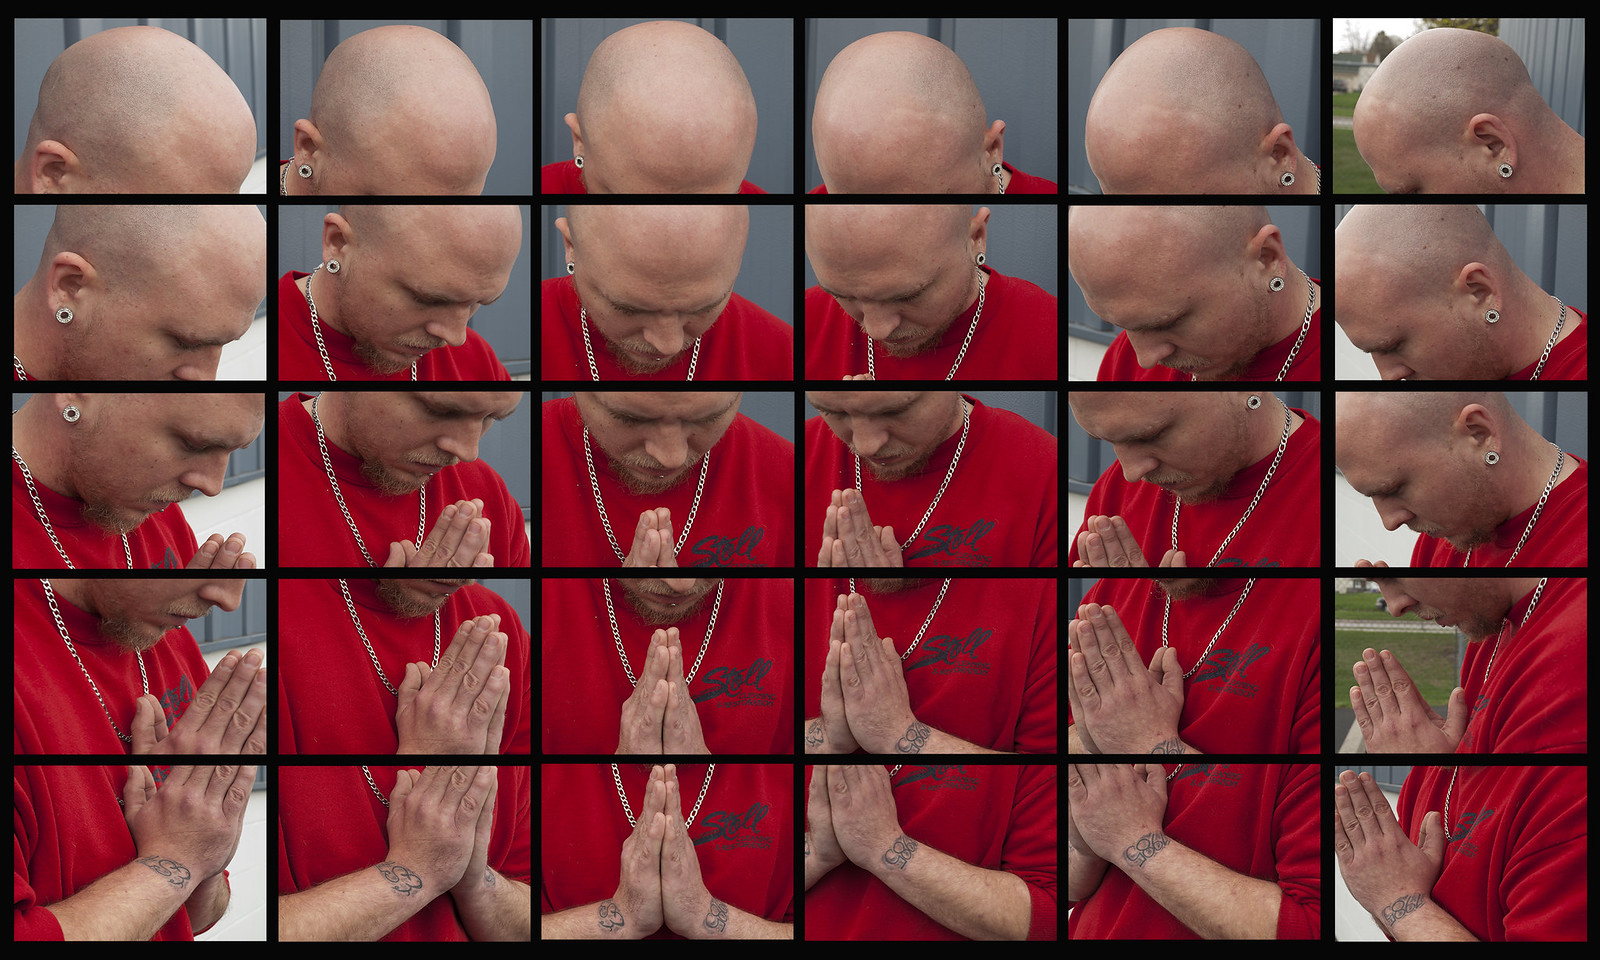
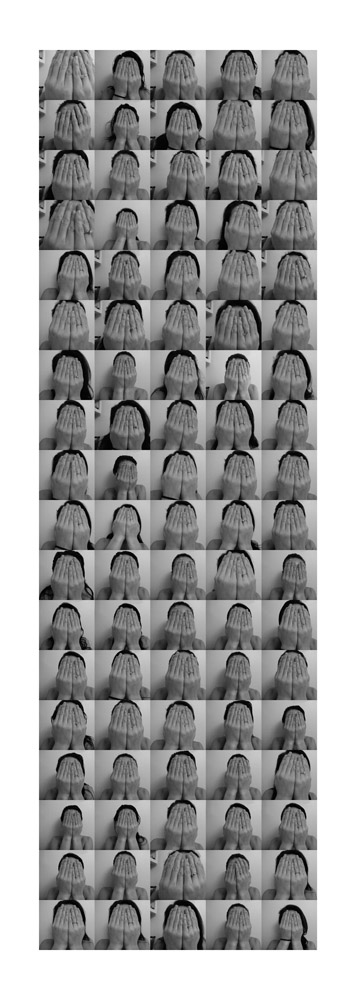
How to assemble all your daily photos into a grid with perfect spacing

Now, you are going to take your individual images and combine them into a single image consisting of a grid of portraits. You are going to create the completed grid with adequate resolution and quality to make a print of no less than 16" in the shortest dimension @ 300ppi. Since 16 x 300 pixels = 4800 pixels wide, this would be appropriate resolution for your width.

Before you begin, be sure to have your images fully edited. I suggest you edit them all at once using Adobe Camera Raw. Browse to them all using Bridge. Control click (right click) and select open in Adobe Camera Raw. Edit them all. Save them all into a new folder.

Then open PS. Go to File > Scripts > Image Processor. Re-size all you images to an appropriate size. Be sure save them into a new folder (though I believe by default it will save them into a folder named JPEG assuming you are saving them as JPEGs). In class, I decided I wanted them all to be 2" wide, so each image was 600 pixels wide (300ppi x 2"). I decided to use 1/4" borders between everything. So, each border is 75 pixels.

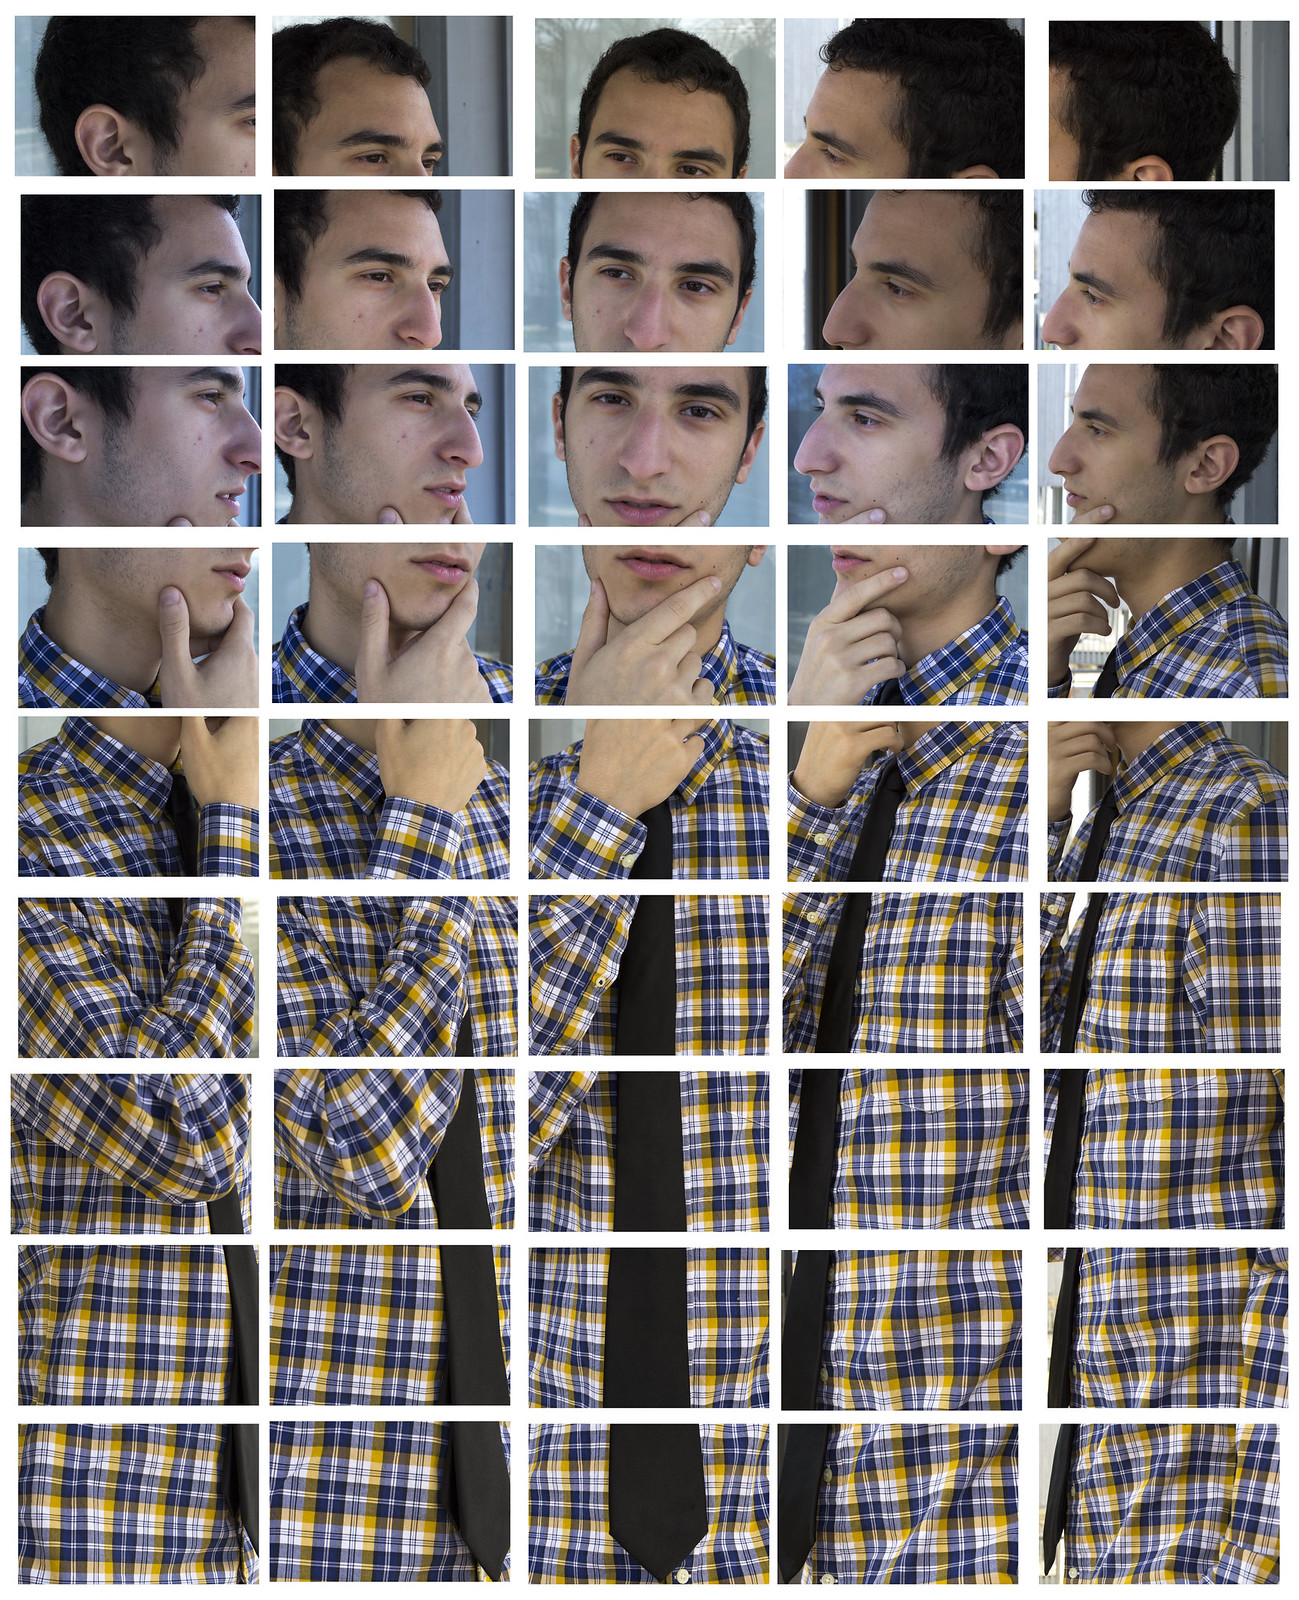
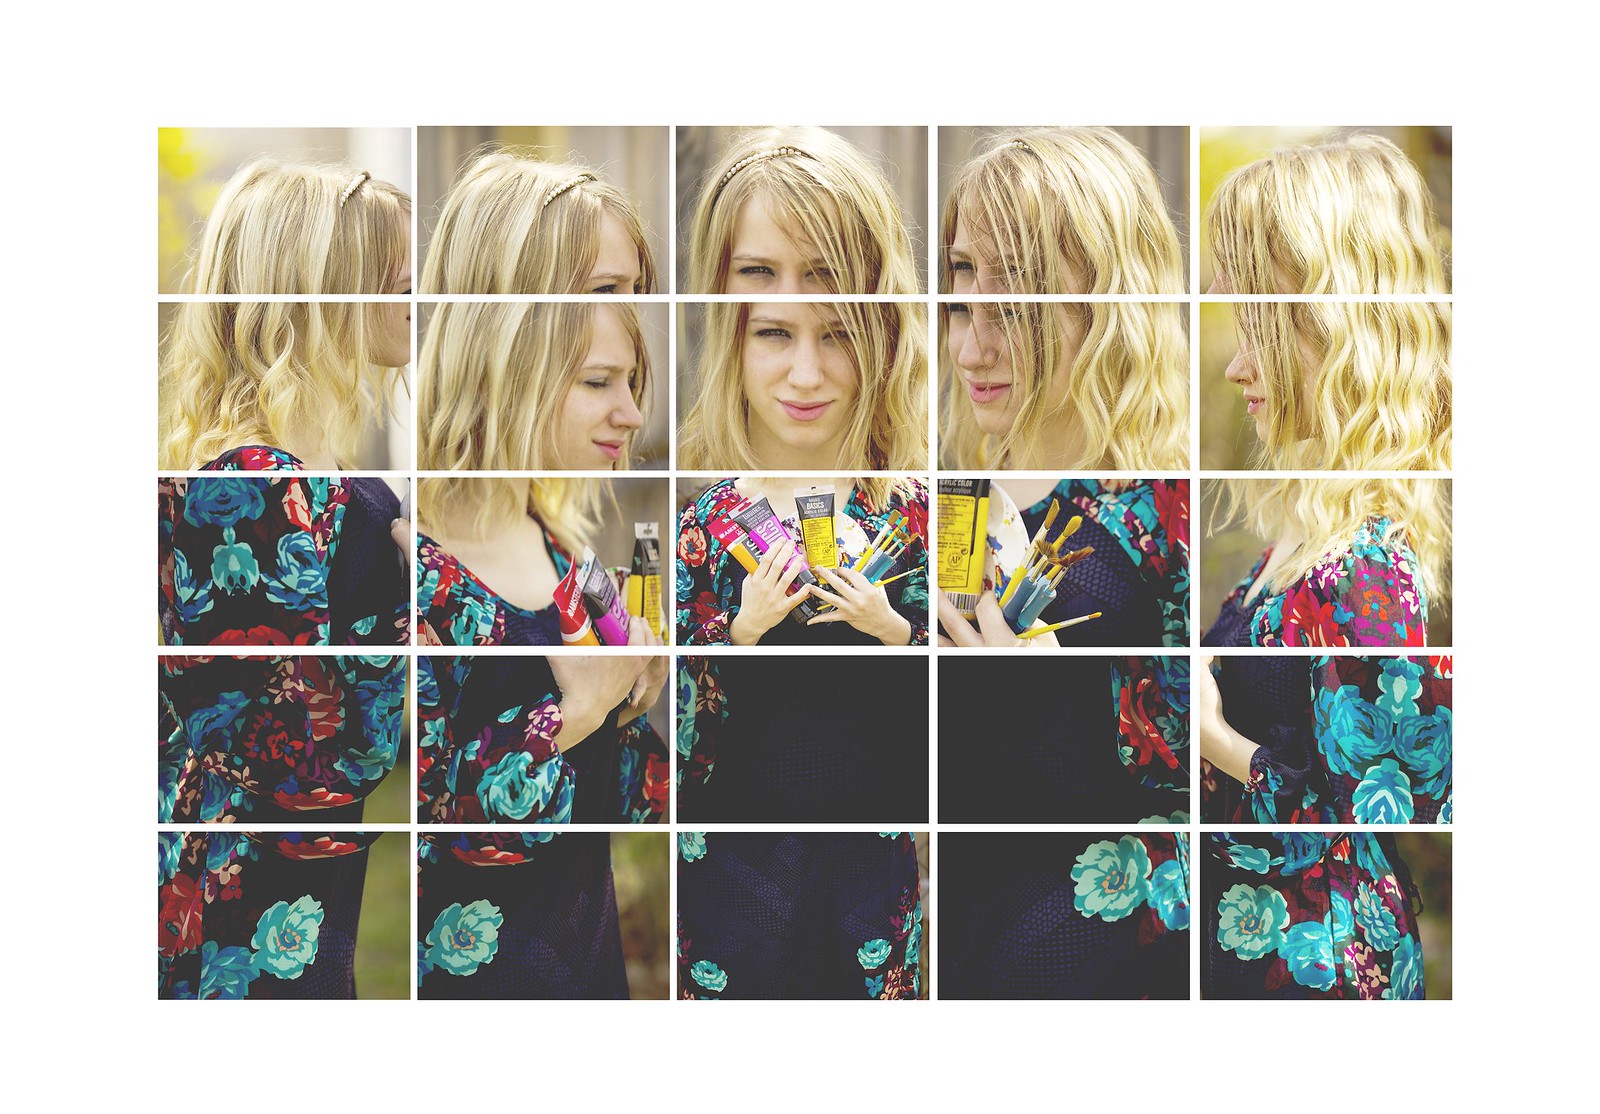
If you have an assortment of horizontal and vertical images, you have to make a few decisions. One option is to crop them all to the same orientation. If you only have a few, then I suggest you go that route. If it is roughly a 50/50 mix, then I suggest you re-size all your images so that the longest dimension is 600px.  Then, layout your grid as though there are 600x600 pixels squares for each image. Then just center your image within that area of the square. That will results in borders that are not uniform in width, but all the images will be equidistant from each other based on their centers (which is to say, it will still look good).

Using Bridge, browse to the folder containing the newly re-sized images. Select them all, then from the main menu go to Tools > Photoshop > Open as Layer Stack. This will open them all up as individual layers in a single image.

Save that image.

Re-size your canvas. For this one I set the width to 4800 pixels wide as discussed above. The dimension that you pick for the height isn't that important now as you can add or crop off canvas from the bottom as needed. I suggest you just go with 4800 pixels high to get started. Keep the stacked layers in the top left when you do the re-sizing.

Then go to Image > Canvas Size and set the width to 16".

Turn on the grid. Make sure snap is on. By default, it is marked every 1/4 inch. If that doesn't work for you, then you will have to go into Preferences and change the grid preferences.

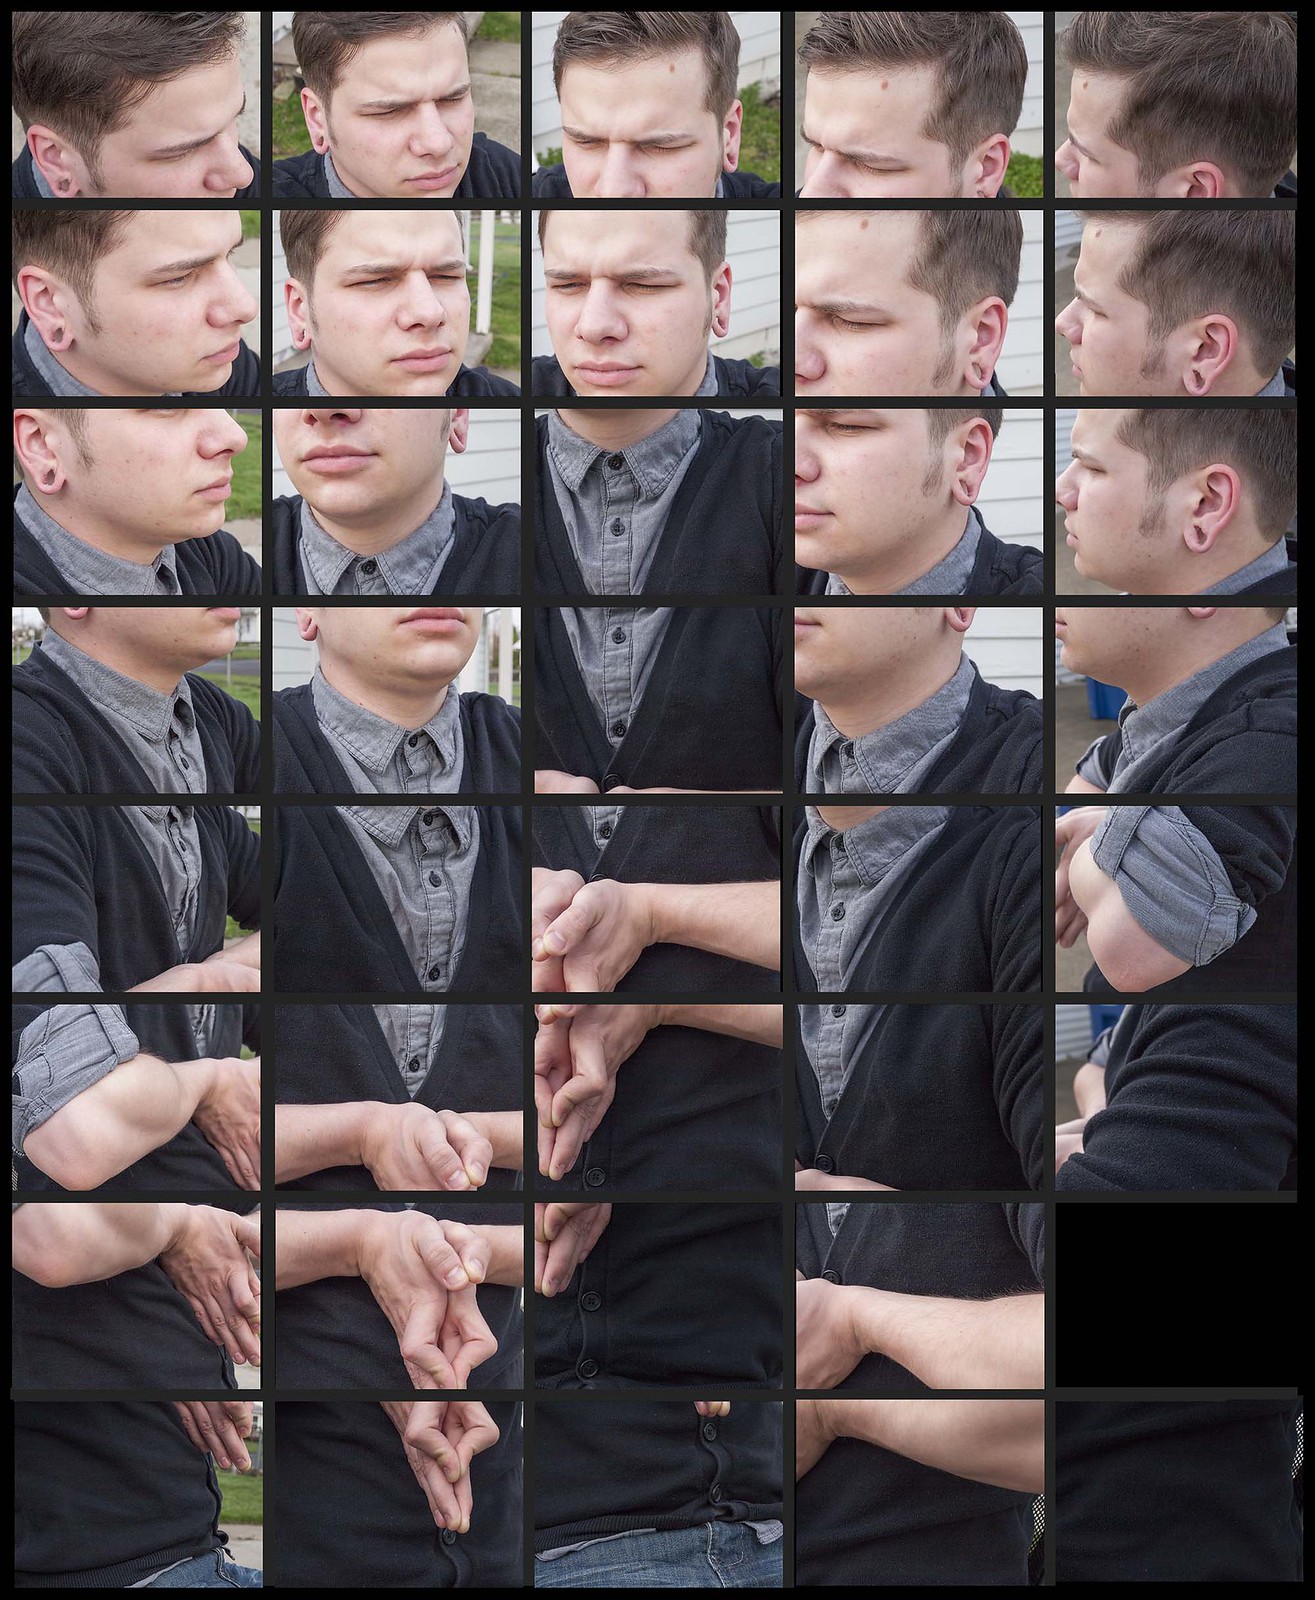
Select one of the layers. Move the layers into place and let them snap to the grid. Not the that your layers are stacked. Are they in the right chronological order? I suggest that you order them chronologically. If they were all taken with the same camera, then they should be automatically stacked in the right order. If you use multiple cameras, you will have to sort the layers out before placing each image within the grid.

Keep doing this until you run out of space. Add canvas to the bottom as needed. When you are done, be sure to save a version with layers intact as well as a version with the layers flattened.

To add a background color, just make a new layer at the very bottom of the layer stack and fill it with any color that you want.

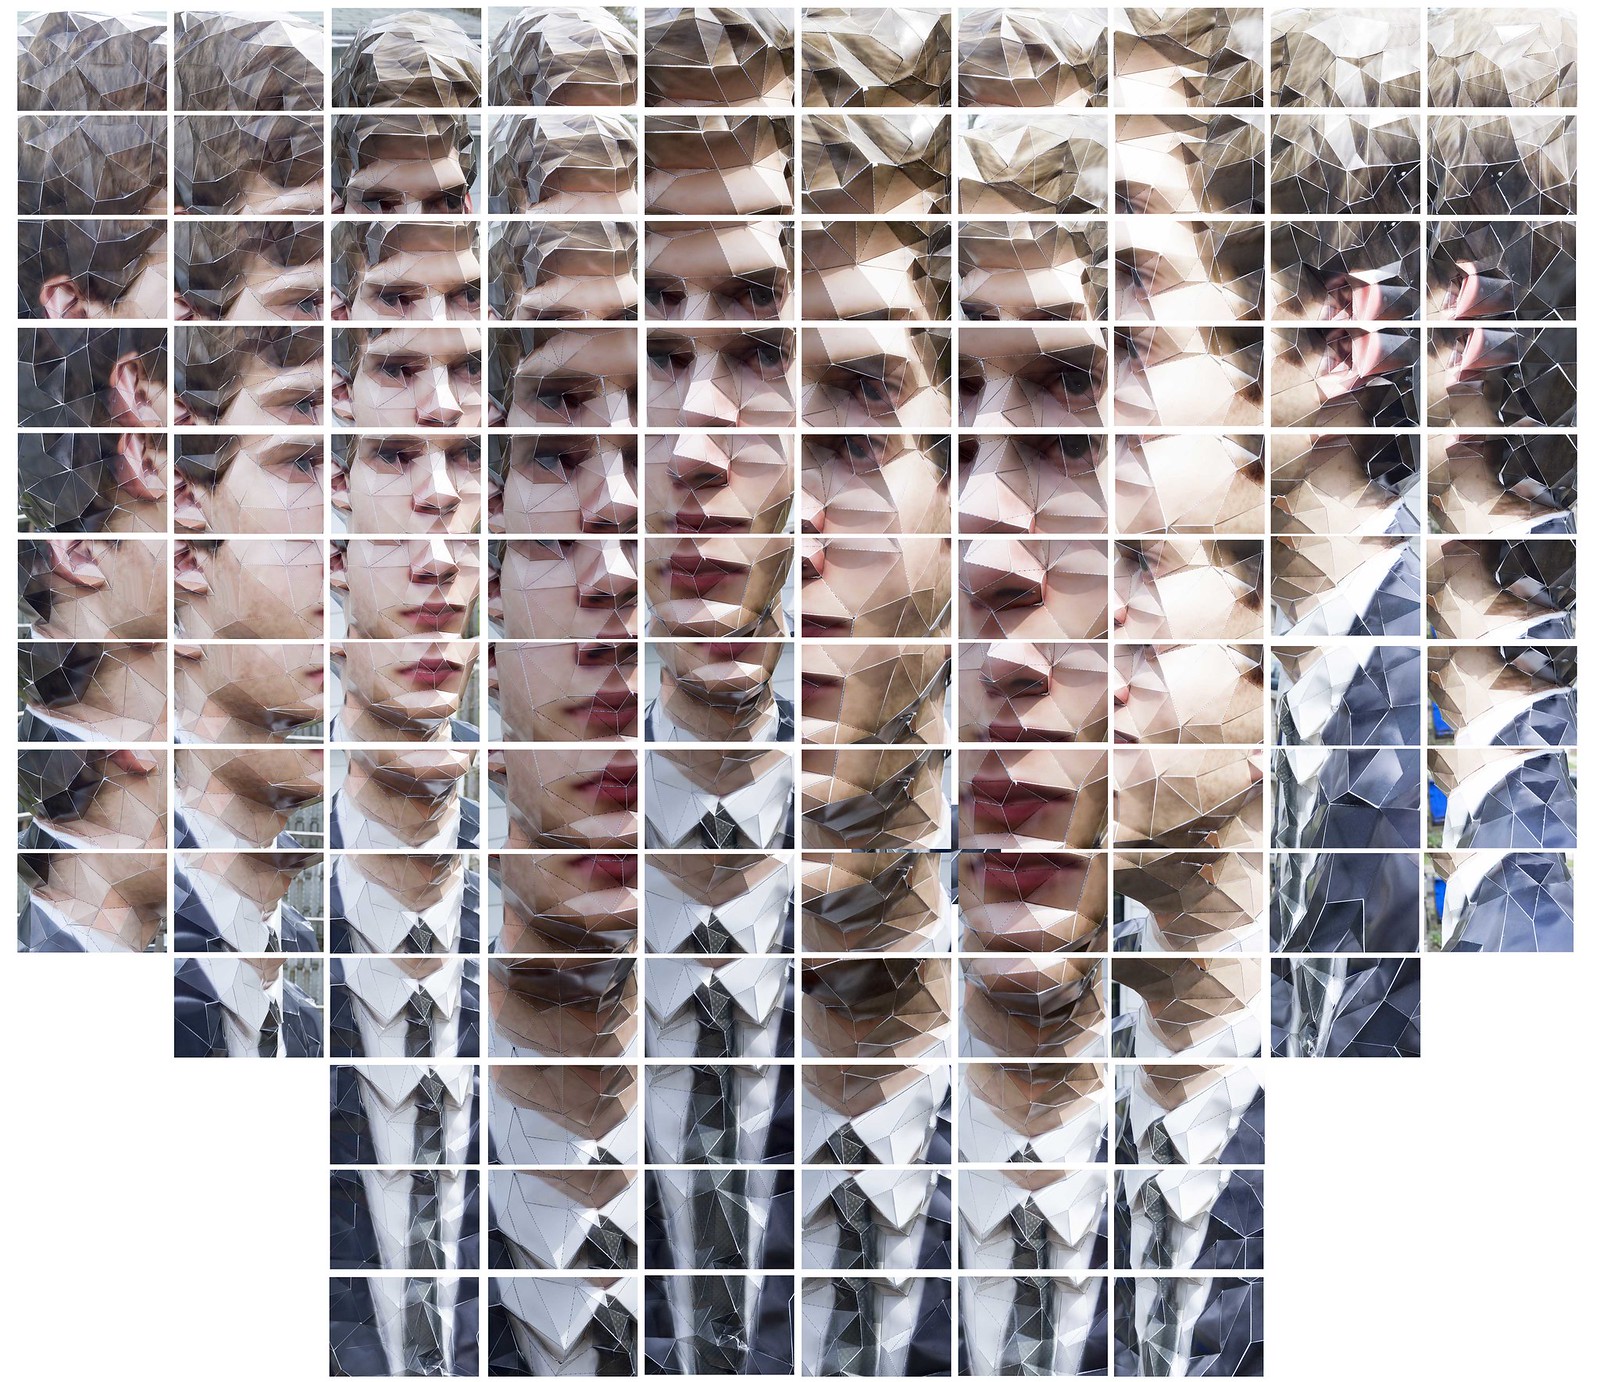
I encourage you to keep up on this project. You can always add more canvas to the bottom of your image to add the additional images whenever you have the time.

NOTE: I want you to have space between all your images.  


How to Assemble your Daily Photos into a Video


Full HD resolution: 1920x1080 pixels. The HD definition corresponds to the 16:9 format, as per modern TVs (Plasma/LCD). This is the size I want your video to be.
If you want, you can even go with what is know as UHD video which is 3840×2160

Here is a very nice write up on how to create a video like this using Photoshop

You need to get all your images to the same height. If you shot all your images with the same camera in the same orientation, that will be very simple to do. Just put them all in the same folder then open them up as a layer stack. Resize the images to 1080 pixels tall. Then make resize the canvas so that it is 1920 wide. This is essentially what you did for the Multi Faceted Personality assignment.

If you have images taken from various cameras or in various different orientations, there are a few more steps. First you sort them into folders by camera/orientation. Then you do the same thing as above to resize them. Then just copy all the layers and paste them all into the same image.

If you prefer or have cause to, you can import all your images into a layer stack and then make a video from that.

Turn on the Timeline window.

Change Create Frame Animation. Click the button. From the drop down menu select Make Frames from Layers.
Change the time that you want each image to appear (how many seconds).
Play it to make sure everything is as you wish. Then export it to Video.

How to render this with good resolution.
Steps:
File-Export-Render Video-MPEG4
Click Settings
~file format: MP4
~video format: H.264
~image size: 1920x1280
~frame rate: 30
click ok
click render
*make sure you saved it in the right location and with the name of the file you want!!

You need to host it on YouTube or Vimeo to get credit for it. Personally, I prefer Vimeo. YouTube may be faster as you probably already have a Google account of some kind and can use that to log into YouTube.


You should have 92 daily photos by today - April 15

The total number of days between Tuesday, January 15th, 2014 and Tuesday, April 15th, 2013 is 92 days. Thus, in a perfect world you would have 92 daily photos.

I know that a number of you went away for Spring Break. If you were photographing something that was Ann Arbor location specific, then I will give you a grace of 7 days. If you fit this criteria, then you should have 85 photos.

Your daily photos should all be on Flickr. I have asked you several times to post them to Flickr every week or two. By tonight, they should all be on Flickr. If they are not, this will negatively impact your project grade.

If you haven't kept up on this assignment, please do not try to pull a fast one and shoot 92 images on a single day and tell me that one was taken each day. It won't work. I can read the data from the files. That would constitute academic dishonesty and I would be required to report it to the university.

If you don't have 85 daily photos, then you can keep shooting through our last day of class, Tuesday April 22 which would allow you to take another 7 photos and assemble and host your video prior to class. Nothing will be accepted after class though.

In addition to having those photos on Flickr in a Set, bring those files in today on a hard drive or flash drive so that you may assemble them into a video during class.

Tuesday, April 8, 2014

Online Print Providers - ordering prints online

AdoramaPix - FYI - currently 40% off until March 31st
They offer prints on rigid aluminum sheets

MPix
Their Black and White is particullary interesting as it is 'real' black and white paper which is to say gelatin silver prints.

ShutterFly

SnapFish

Paper choice
set the color space
sRGB is important - check of Flickr images in wrong color space
quick primer on monitor calibration


Fuji Crystal Archive 
11x14 Print$7.99

I want to order a few prints to see how this all works and how good the prints look. 

I want you to order at least 3 8x10s or 2 11x14s. Should be under $20. Maybe a bit more with shipping. Optionally, you can order a photo book. 
I would like at least one of your prints to be from photos taken during the semester. 


color spaces and Flickr

It is important to keep your files in the sRGB color space for use on Flickr (or for any screen use for that matter). If you upload images in Adobe RGB color space, they will experience a very noticeable color shift.
Below is a screen grab from Flickr showing an identical image except for the color space assigned. It isn't supposed to be purple.
When preparing an image for print, use the Adobe RGB color space which works with a larger range of color.

Tuesday, April 1, 2014

Your Happy Place - Student Examples and write-up

NOTE: You need to create two of these!!

For this project, you will create an images dealing with the notion of an individual's idea of their Happy Place.

Essentially, you are going to take a portrait of someone and then combine it with a photo of the place in which they feel most happy, most at peace, or most sacred.

You will combine the images to make into one composite image. The technical aspects are really pretty easy.

I would like you to follow this link and watch the video to more fully understand the process. If your camera doesn't support multiple exposure, or you don't want to combine them in camera, then you can combine them in your image editing application.

Some Canon Digital Cameras offer a very fancy way to do this where you can select a starting image and see that overlapped in real time with what you are shooting for the second image. Here is a really nice write up and video on the topic.

This may sound crazy, but don't worry about how the two images will go together. Just try to create two compelling photos. How they go together is part of the happy accident/magic of the whole thing. You may even want to combine horizontal images with vertical images. I would take multiple portraits of the same person and multiple shots of the happy place so that you have some to choose from if necessary.

Here are some nice multiple exposure portraits created in the same way.
And some more…
Here are yet some more, but they seem less 'happy accident' and too forced for my taste

In Summary:

If you are shooting digitally, see if you camera supports in-camera multiple exposure. If so, you may want to go that route (especially if it supports Live View overlay of the first image). If not, shoot the two shots, convert them to Black and White (for this assignment anyways) then combine the layers in your image editing program.

If you are shooting film, see if your camera supports multiple exposures. If so, you may want to try it that way. Of course, the problem with this is that you have to shot the second shot right after shooting the first shot. Not a big deal if you take the photo of your subject in the place where they are happy.  If you camera doesn't support multiple exposure, then you just shoot both things separately, scan the negs, and combine them in you image editing program.  If you camera doesn't support multiple exposure, but you really want to do this in camera, you can take the portraits first. Then you can rewind the film and advance it to the correct frame to shoot the happy place over it. Tricky, but doable.

In order for the final composite to look good, you have to take two really nice photos. The composition of the portrait is particularly important as it is largely responsible for the composition of the final composite. Beware of too much negative space. Think carefully about the posing. Can you include a hand or arm to break up the space and not just take a 'senior photo' 'head and shoulders'  looking image?

The images must have some contrast. The partial obfuscating of the portrait with the image of the place only happens where there is changes in tone. If both images are flat, expect an unsatisfactory composite. When shooting Black and White film, consider the use of color filters when appropriate to create difference in otherwise similar tones.

When shooting in color, it is very important that you take time and care in your black and white conversion in your image editor.

Tuesday, March 25, 2014

Multi Faceted Personality


A nice series of work by an Italian photographer Maurizio Galimberti. He used Polaroids for these, of course you don't have to use Polaroid film.

For this assignment, you will shoot it digitally and composite the images using an image editing program.

How to shoot such an image:

Decide on the structure of the resulting grid. Suggestions:
7x5
5x7
7x10

Images must have a great deal of overlap. Get close. Get even closer. Closer still.


You will have to be very close to your subject. You must be able to focus closely. Don't get so close that your camera can't focus.

Your depth of field become more shallow the closer you are to your subject. Thus, you should stop down as much as possible  (use the smallest aperture that you can get away with) to maximize your depth of field.


Perspective must change a lot between each shot.

Consider if you want your subject to remain in a static pose or not. 

Image shot under diffuse lighting if possible (avoid strong shadows on part of the face unless you are going for a certain affect). 


Start with a 3x3 to get a feel for the results. Assemble it.

From there, get increasingly complex.

If even one image is blurry, throw it out and take it again.  

How to assemble the images:


Edit all the photos in Camera Raw. Synchronize them so that all the edits are the same.

Save a downsampled copy of all the files as TIFF into a single folder.

From within PS, import the images into Photoshop as a Layer Stack. 

Files > Scripts > Load Into Layer Stack.

Increase your canvas size. Final image should be at least 5000x5000 pixels.

Move your images into place.

Use a grid or 'pixel shim' to place your images correctly.

Save the multi layered image as a TIFF.

Also save a JPEG version to upload to Flickr.


In class we worked on taking a 3x3 and quickly assembling it. If that looks like it will be good, then work on a more complicated one. If it came out poorly, then shoot another 3x3 and try to loosely assemble it just to assess your shooting. Only then move onto the more complex 5x5 (or more) images.

By next class, shoot images for an assemblage of at least 6x6 or 5x7 images. No need to edit them or attempt to assemble them yet. Please spend some time looking at the portraits on the website to which I linked above. I think the 5x7 images look particularly good, but you can go nuts and shoot a 10x10 if you desire.

If you are feeling ambitious:
Try to show multiple facets of one's personality in this collaged piece. Consider half of it shot with one hair style, facial expression, clothes, makeup, whatever, and the other half of the images shot with a change of one of more of those elements. I wouldn't do exactly 1/2 and 1/2. Mix it up some. You may want to shoot 5x5 of both 'dress ups' and then choose which ones to combine later. You could do something like the image below but both sides would represent different facets of the same person's personality.
Or combine two people such as in the image immediately below.


Next class we will go over how to fully assemble them and spend more time discussing resolution. So the quiz will only cover the following:  composition, focal length, and black and white conversion.


Student Examples

LHSP Students


UT Students

Series of Video Tutorials on how to assemble these images

I made a video series which covers the basics on how to assemble your image grid. I did it kind of fast, so the gaps in my resulting 'demo' image aren't perfect, but you will get the gist of it. You should be able to get perfect spacing on yours.

I will go through all this in class tonight (April 15 -tax day), but I made these to assist you assembling it outside of class if necessary. To re-cap, you just need the RAW images for class tonight - you don't need to attempt to assemble them as we will do that in class.

Video Part I

Video Part II

Video Part III

Video Part IV

Nice assortment of 'vintage look' actions

Blue Vintage filter that I used in the video. NOTE: It downloads as a .rar file and you have to have a program that can uncompress that. 7Zip is a free utility that opens and writes a number of compressed file formats included .rar. It is Windows only. Try RARExpander for Macs. Or just pick a different action that isn't saved as a .rar file!!


3x5 assemblage from Video with action applied

3x5 assemblage from Video without action applied

completed 5x11

complete 5x11 assemblage with selected action applied


Tuesday, March 18, 2014

Focal Length Technical Assignment #5 - due Tuesday

Two sets of photos: ALL IMAGES MUST BE EDITED TO THE BEST OF YOUR ABILITY. MAKE A SET FOR EACH ON FLICKR. THIS IS TECHNICAL ASSIGNMENT #5

All photos must be taken off campus. The exceptions being the Arboritium and the Matthei Botanical Gardens (which are really very nice and worth the short trip). 

All photos must be edited to the best of your ability. White balance, tone, etc.

1. Take a set of photos of three objects. A foreground, middle ground, and background. Set the camera up on tripod. Take an image at your longest, shortest, and middle of the road focal lengths. Don't move the camera at all between the shots. Use the same exposure for all the shots.
This image illustrates the idea of what you are trying to do.   
Another example. 

2. Select a subject. Take an image at your longest, shortest, and middle of the road focal lengths. Move the camera as necessary to keep the foreground subject the same size. A friend works well as a subject. Note how the apparent distance between foreground and background elements seems to change.Use the same exposure for all the shots.
Here is a nice example of what you are trying to do. 
Here is another nice example of what you are trying to do. 
Here is yet another example.  

3. Ten creative photos which not only demonstrate an understanding of focal length but good composition as well. They should all be distinct.

Other links you might find useful/interesting:
Effect of focal length and DoF
Illustration of the effect of changed perspective in combination with change in focal length
Series of portraits taken using different focal lengths and perspectives.


Composition


You should read this by March 18th.

The Art of Black and White Photography: Techniques for Creating Superb Images in a Digital Workflow, read Part III: Rules of Composition. The whole thing.


A really great Kodak presentation on photo composition made in the late 1970s. I love this presentation. I have it on slide and audio cassette; easier to show this way.

Kodak Guidelines for Better Photographic Composition - this is an old Kodak guide to photo composition that someone scanned and transcribed. The images still hold up. It is a newer version of the other presentation.

Kodak Guide to Better Pictures: Composition - simplistic, but there is still some good information and images here.

Trichromy - student work Winter 2014

Marlee

Emma


Rachael


Kip


Noah


Celeste


Robbie


Courtney


Nikki


Tuesday, March 11, 2014

Class Trichromy Photos


Preferred iPhone Apps

Photogene $2.99
PhotoForge - no longer available ;-(

Free!!!
SnapSeed
PS Express


Trichromy - Color from Black and White

Two unique images should be in a Flickr set by Tuesday. Nothing that you shot as part of our in class demos will be accepted. Go crazy with this assignment!


Article translated into English using Google Translate

One clever aspect of some of his images are that he isn't using a tripod, so the images are a little bit off as well which results in color fringing throughout the image. He could easily 'register' the images in an image editor, but I assume he likes the look (so do I).


Below is a really nice use of the process. Image is by Flickr user Budzillab.
Below is an image by a friend of mine named Branna.


Even though this assignment is based on a technical/creative technique, I still want them to be great images. Please take some time and make a really strong image.

Below, is an image that I photographed and assembled as a demonstration for the class pictured.


Background
Some of the earliest color photos were taken and exhibited before the advent of color film materials. Prokudin-Gorskii was one such photographer. The Library of Congress has an excellent website dedicated to his work which explains the process that he used. Eseentially, he would take one photo for the Red light, one for the Blue, and one for the Green using black and white film. Then he would project the resulting images from three different projectors one each for Red, Green, and Blue. This would reconstitute a full color image. This is not to dissimilar from how most digital cameras record color (more on that at another time).

Trichromy via Multiple RGB Exposures
You can get a similar effect by taking three separate exposures on the same piece of color film using a red, green, and blue (the primary additive colors) filters respectively. If you are shooting digitally, you can achieve the same effect by taking one channel from each image (red, green, blue) and combining them into a new image. The trick is that have to use a tripod to take three photos of a scene in which part of it has movement and part of it does not (or not depending on the look that you want). The trick is that you have to pre-visualize how the resulting image will look once composited.

How to combine the channels into one composite image
In order to combine them into one as shown above, you first edit one of them using Camera Raw (assumes you captured your images as RAW files). Then synchronize all three images. Then take one of the images, select the Red channel, right click it, select Duplicate Channel, Create New, name it Red. The basically do the same for the other two channels, taking the Green from one image and the Blue from another. These new images will be in a weird Multichannel Mode. Go to Image > Mode and change the mode to Grayscale for each of them. Save each of the three files to the same directory as TIFFs (I don't think that you have to do this, but it is a good idea should something go wrong). Then, go to one of the grayscale files, let's say Red. Make sure the other files are also open so you should have three files open now, one named Red, one named Green, and one named Blue. Select one of the images. Go to the Channels Palette. Hit the little hidden menu icon in the corner to revel the drop down menu. Select Merge Channels. Then select RGB Mode. Make sure it is set to 3 colors. Then hit OK. It should automatically list the three channels that will make up the color version. Make sure all 3 channels are indicated in the correct order. This will then give you full color image. Are that didn't move should look normal and those parts that moved will have different colors to them.
NOTE: You will get a slightly different look by changing the images from which you took the respective primary color from. That is to say, you can take the Red, Green, and Blue channels from a different one of the original color images. This will result in the colors being different.
NOTE: All 3 images must be the EXACT same size. That is to say they must have the exact same pixel dimensions.

Putting together a Trichromy image using GIMP

Similar thread about free programs that can do this...

Here is a tutorial which pretty much ends up with the same results, but goes about it differently. The article refers it as being a Harris Shutter Effect. This process is really more like early color photography than a Harris Shutter as it requires three exposures; one through each of the primary additive colors: Red, Green, and Blue. A Harris shutter is used during a single exposure. It's goal isn't to create a normal looking image, rather to create a full color image with some funky color fringing. Here is a write up on creating a real Harris Shutter.

Article about how NASA takes photos of the earth. Particularly timely as we just discussed how to build up a color image from black and white photos.

Flickr Thrichromy Group

Have fun with this assignment!

Student Examples