Tuesday, March 25, 2014

Multi Faceted Personality


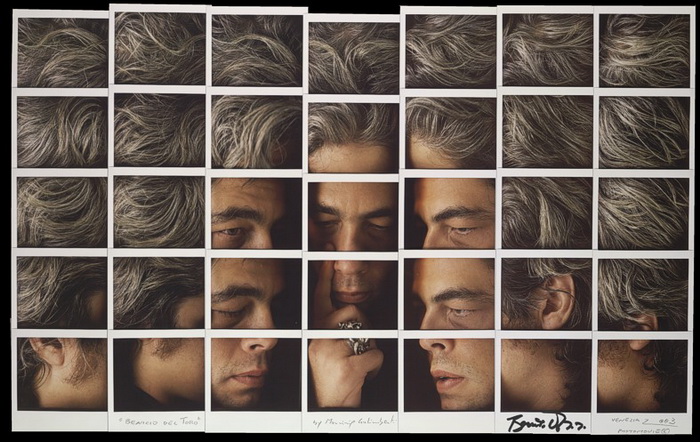
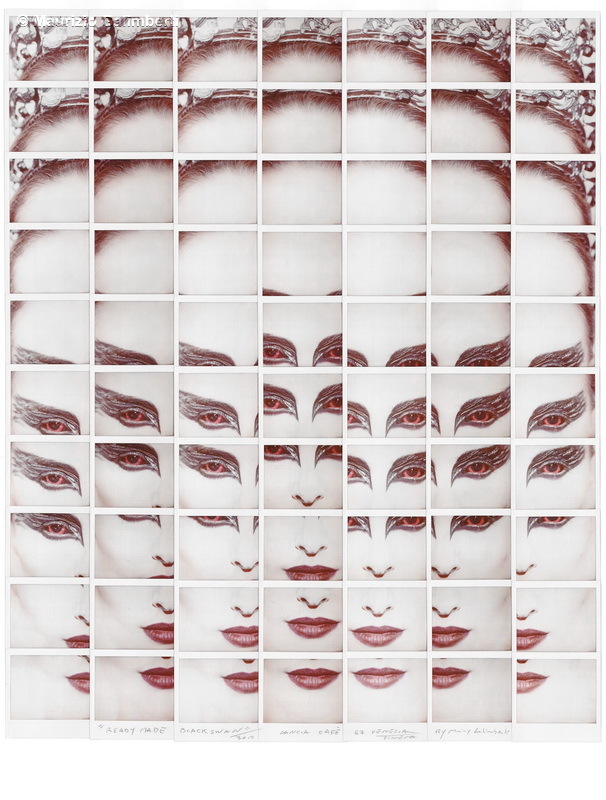
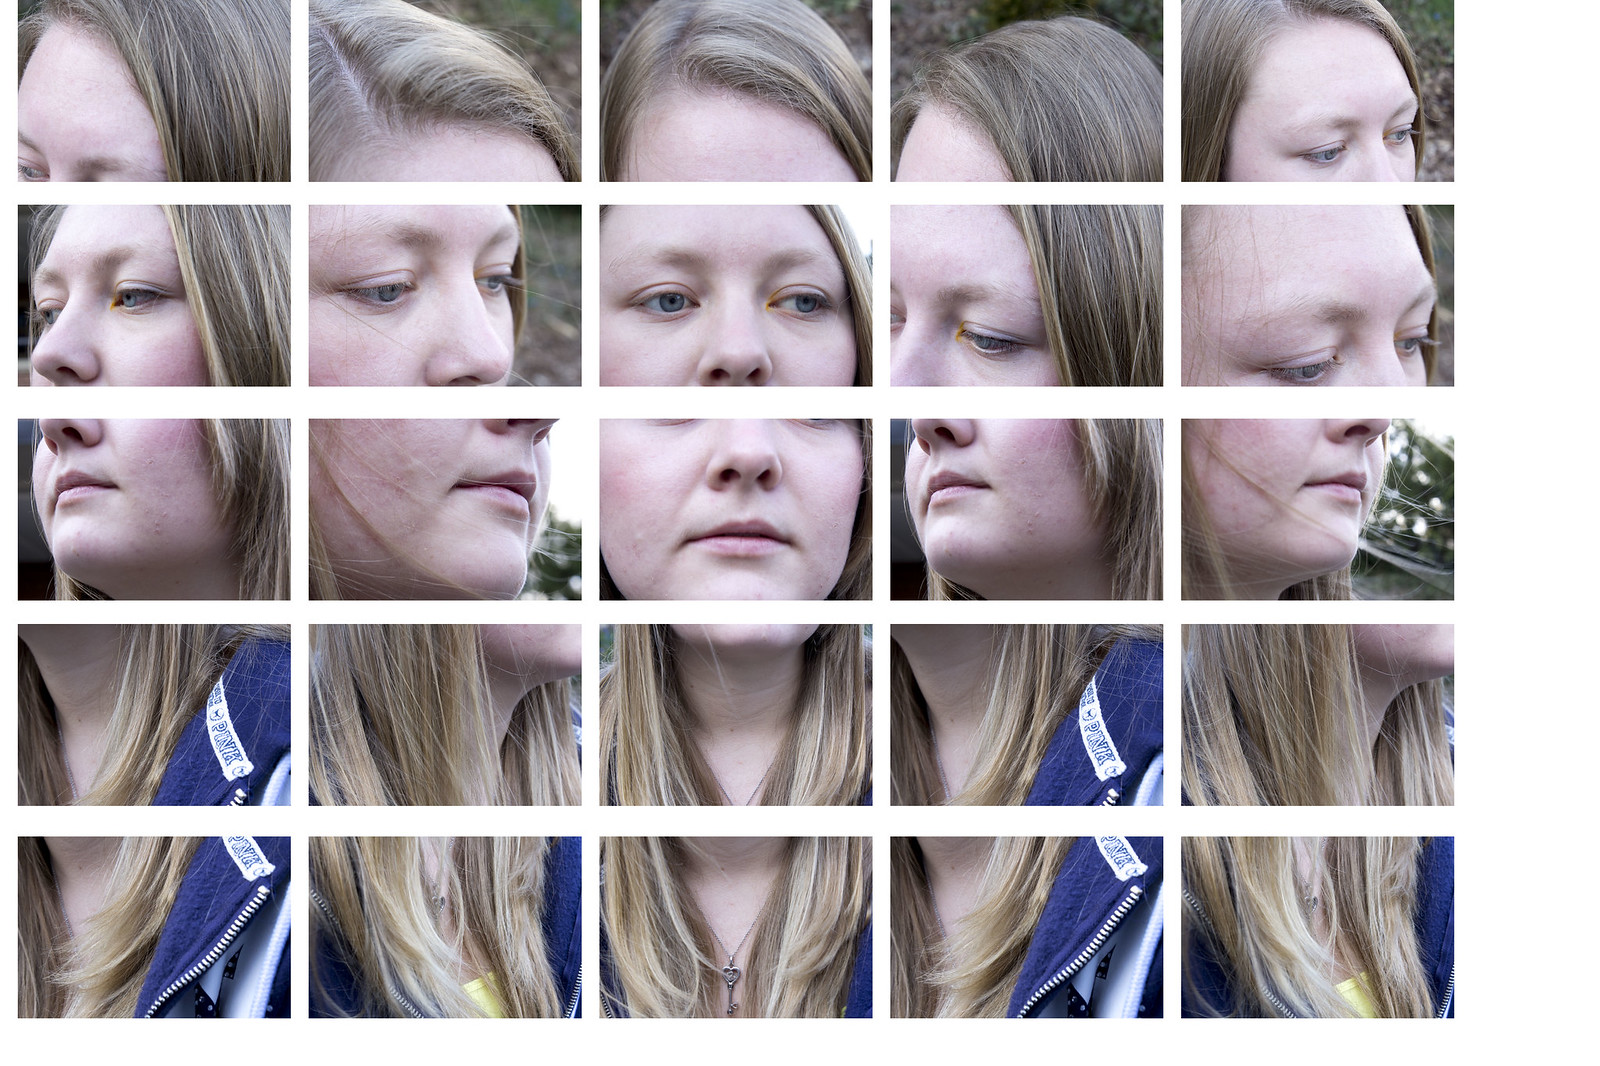
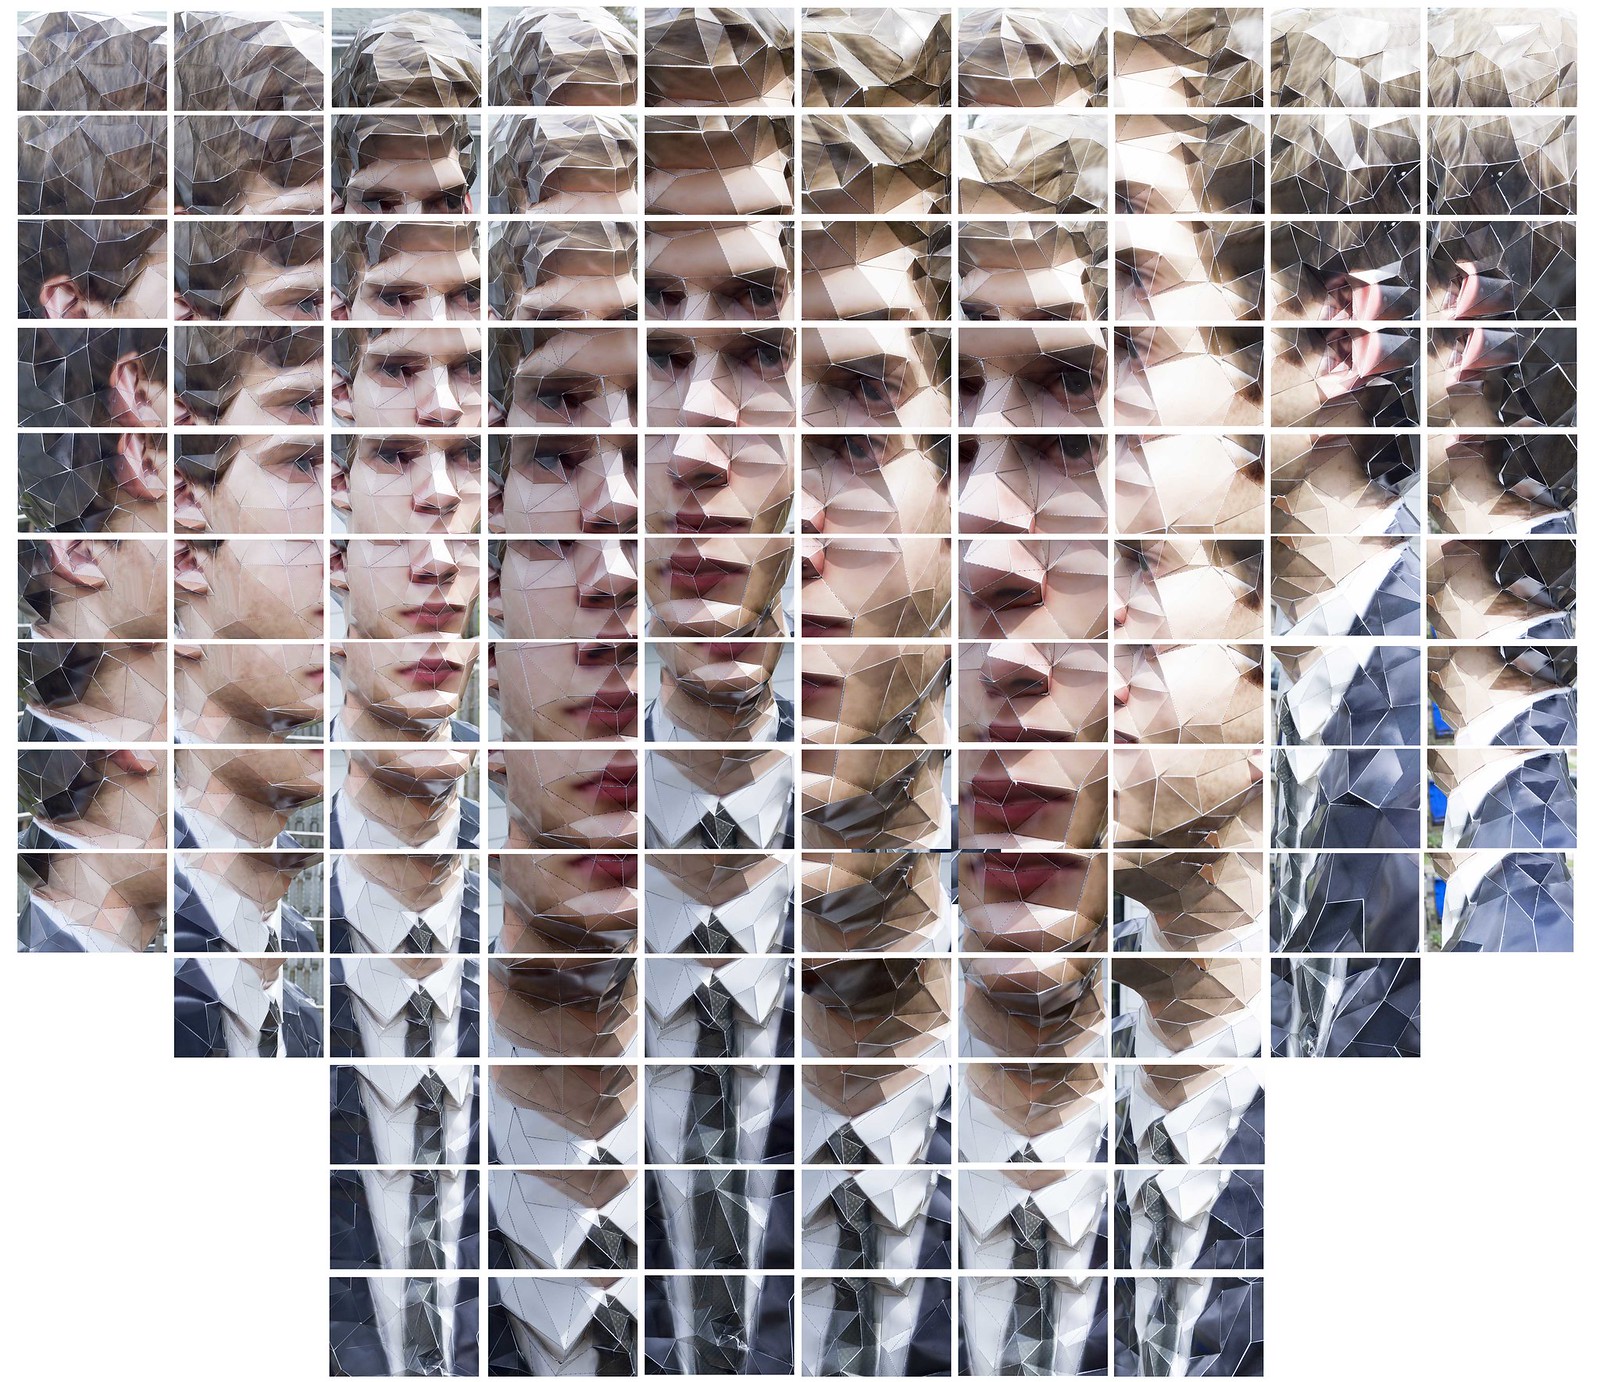
A nice series of work by an Italian photographer Maurizio Galimberti. He used Polaroids for these, of course you don't have to use Polaroid film.

For this assignment, you will shoot it digitally and composite the images using an image editing program.

How to shoot such an image:

Decide on the structure of the resulting grid. Suggestions:
7x5
5x7
7x10

Images must have a great deal of overlap. Get close. Get even closer. Closer still.


You will have to be very close to your subject. You must be able to focus closely. Don't get so close that your camera can't focus.

Your depth of field become more shallow the closer you are to your subject. Thus, you should stop down as much as possible  (use the smallest aperture that you can get away with) to maximize your depth of field.


Perspective must change a lot between each shot.

Consider if you want your subject to remain in a static pose or not. 

Image shot under diffuse lighting if possible (avoid strong shadows on part of the face unless you are going for a certain affect). 


Start with a 3x3 to get a feel for the results. Assemble it.

From there, get increasingly complex.

If even one image is blurry, throw it out and take it again.  

How to assemble the images:


Edit all the photos in Camera Raw. Synchronize them so that all the edits are the same.

Save a downsampled copy of all the files as TIFF into a single folder.

From within PS, import the images into Photoshop as a Layer Stack. 

Files > Scripts > Load Into Layer Stack.

Increase your canvas size. Final image should be at least 5000x5000 pixels.

Move your images into place.

Use a grid or 'pixel shim' to place your images correctly.

Save the multi layered image as a TIFF.

Also save a JPEG version to upload to Flickr.


In class we worked on taking a 3x3 and quickly assembling it. If that looks like it will be good, then work on a more complicated one. If it came out poorly, then shoot another 3x3 and try to loosely assemble it just to assess your shooting. Only then move onto the more complex 5x5 (or more) images.

By next class, shoot images for an assemblage of at least 6x6 or 5x7 images. No need to edit them or attempt to assemble them yet. Please spend some time looking at the portraits on the website to which I linked above. I think the 5x7 images look particularly good, but you can go nuts and shoot a 10x10 if you desire.

If you are feeling ambitious:
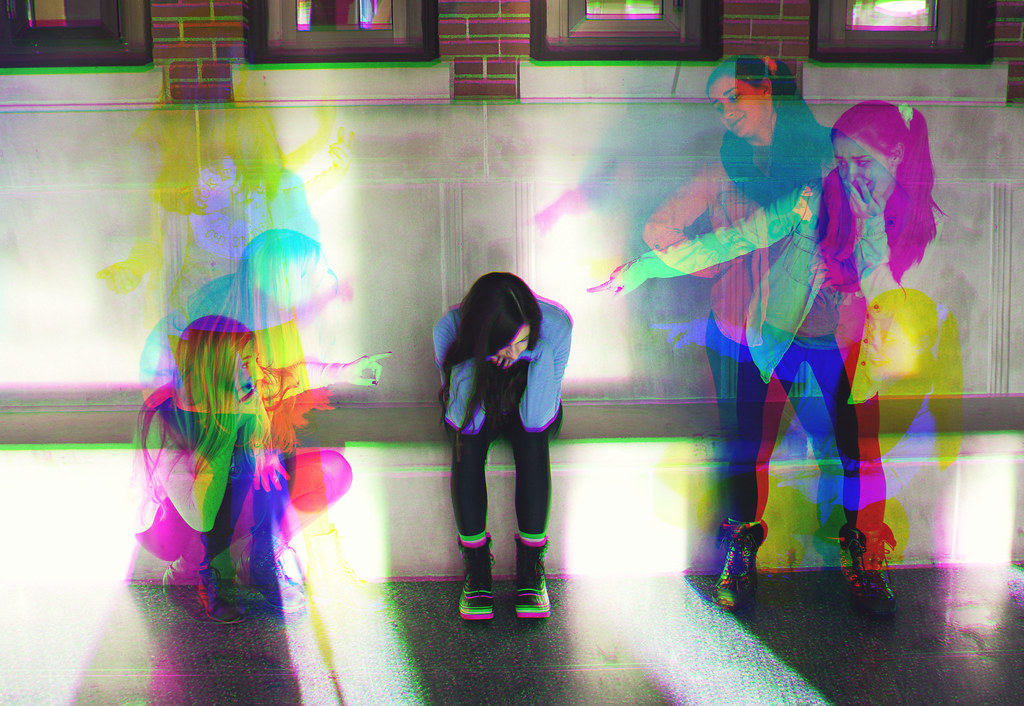
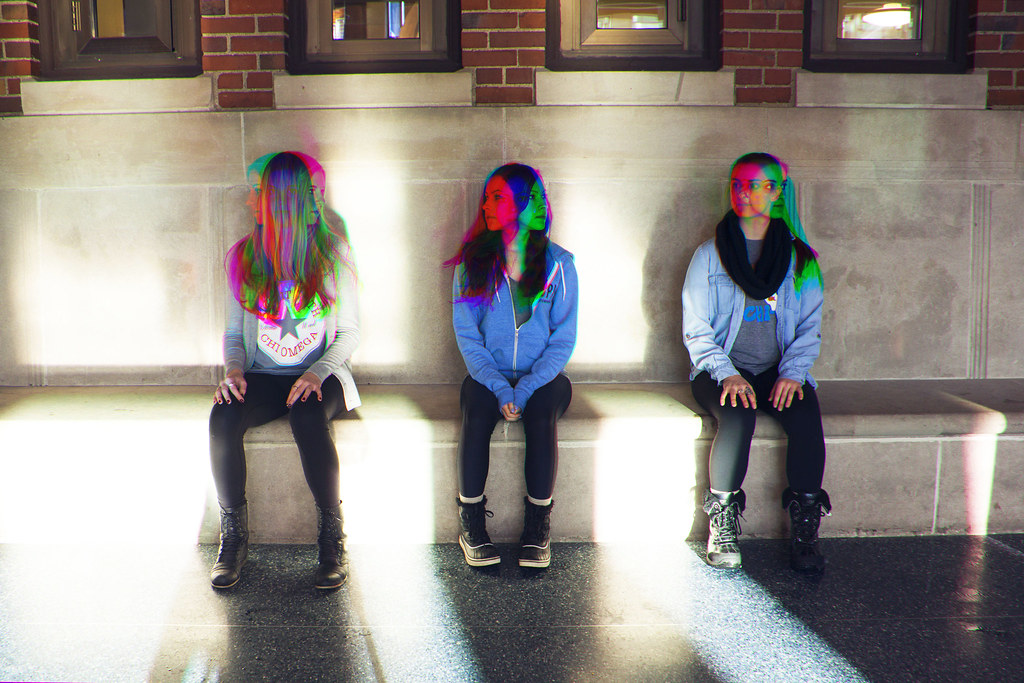
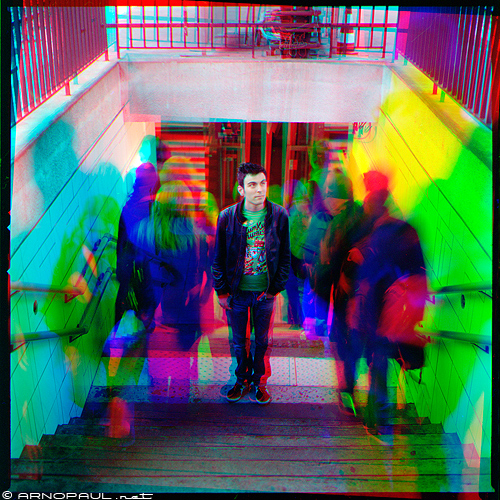
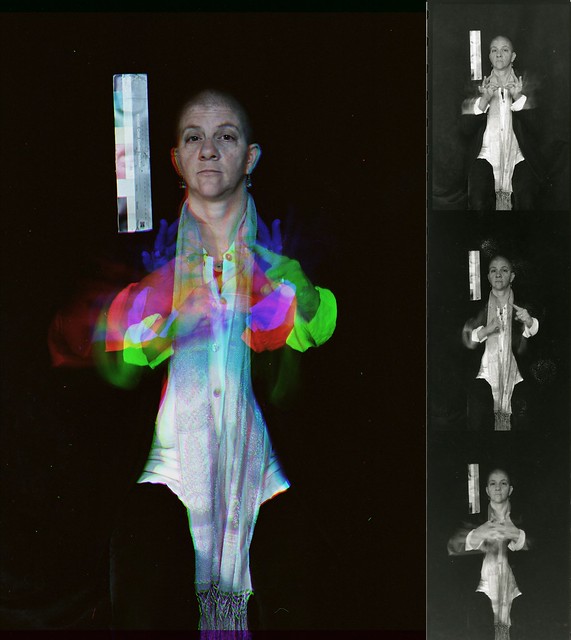
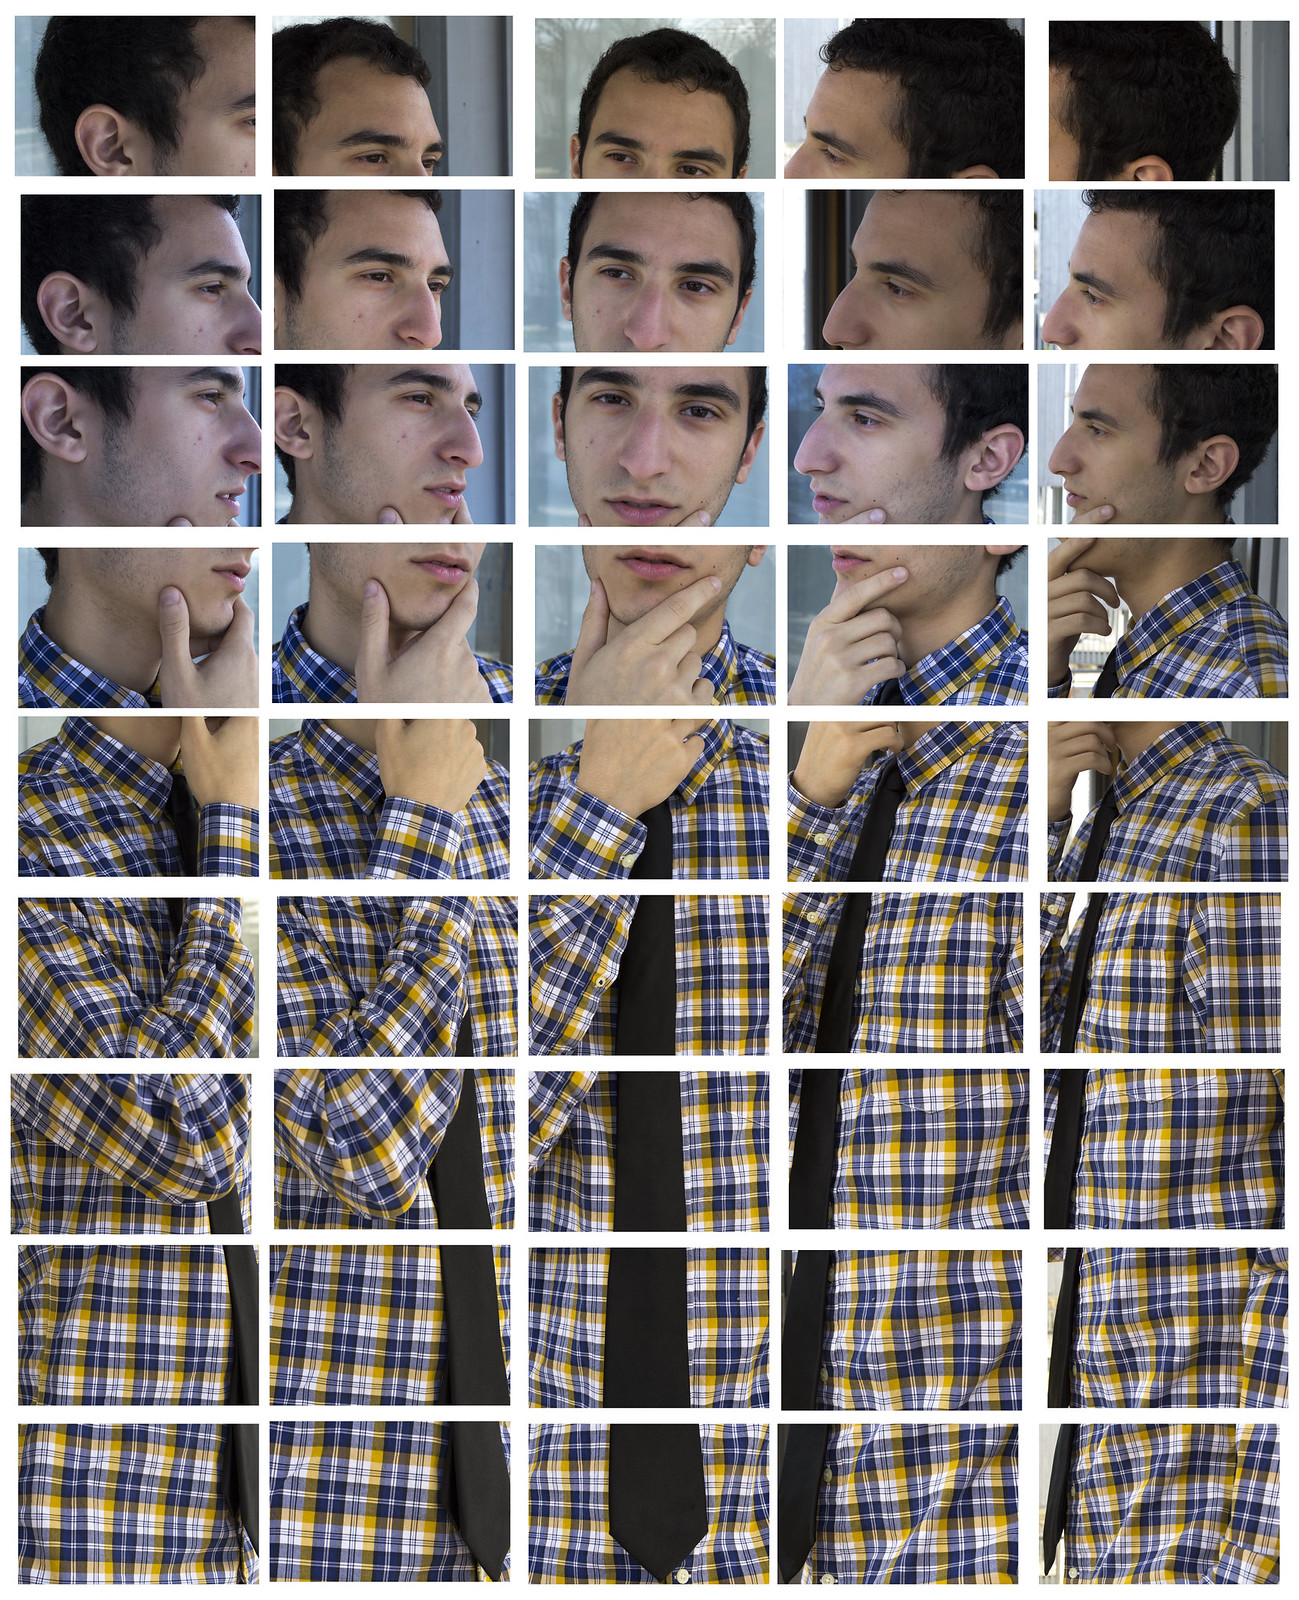
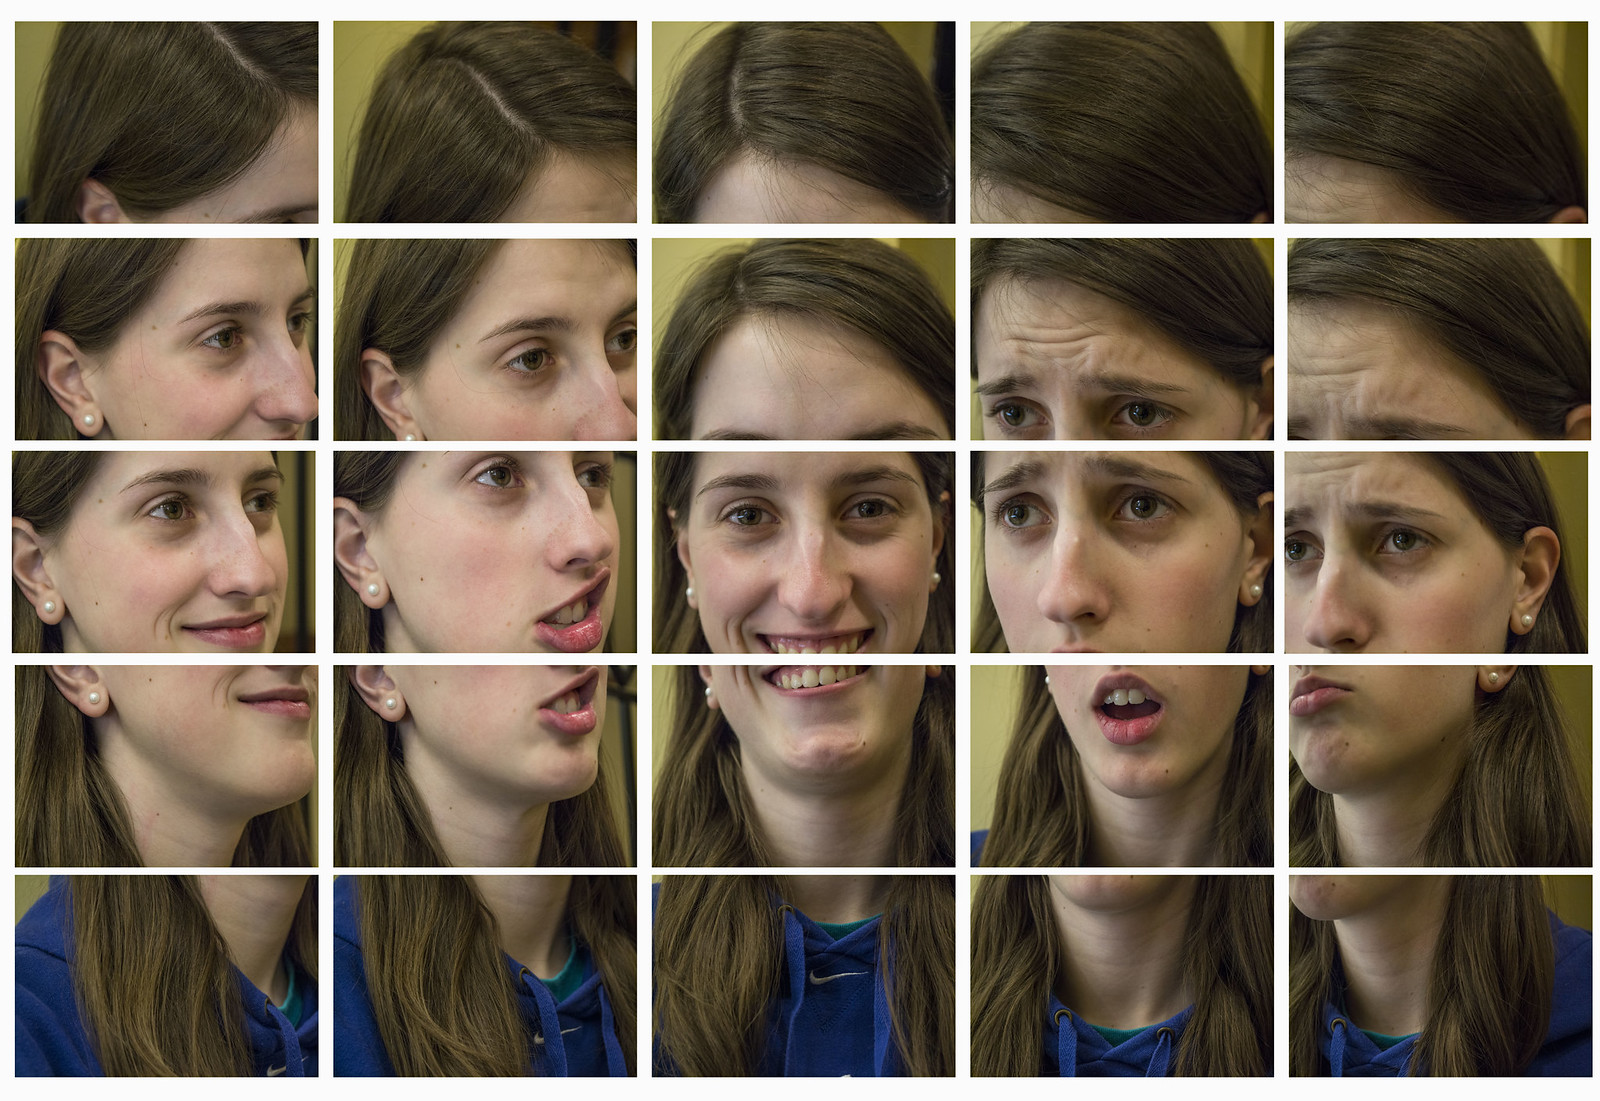
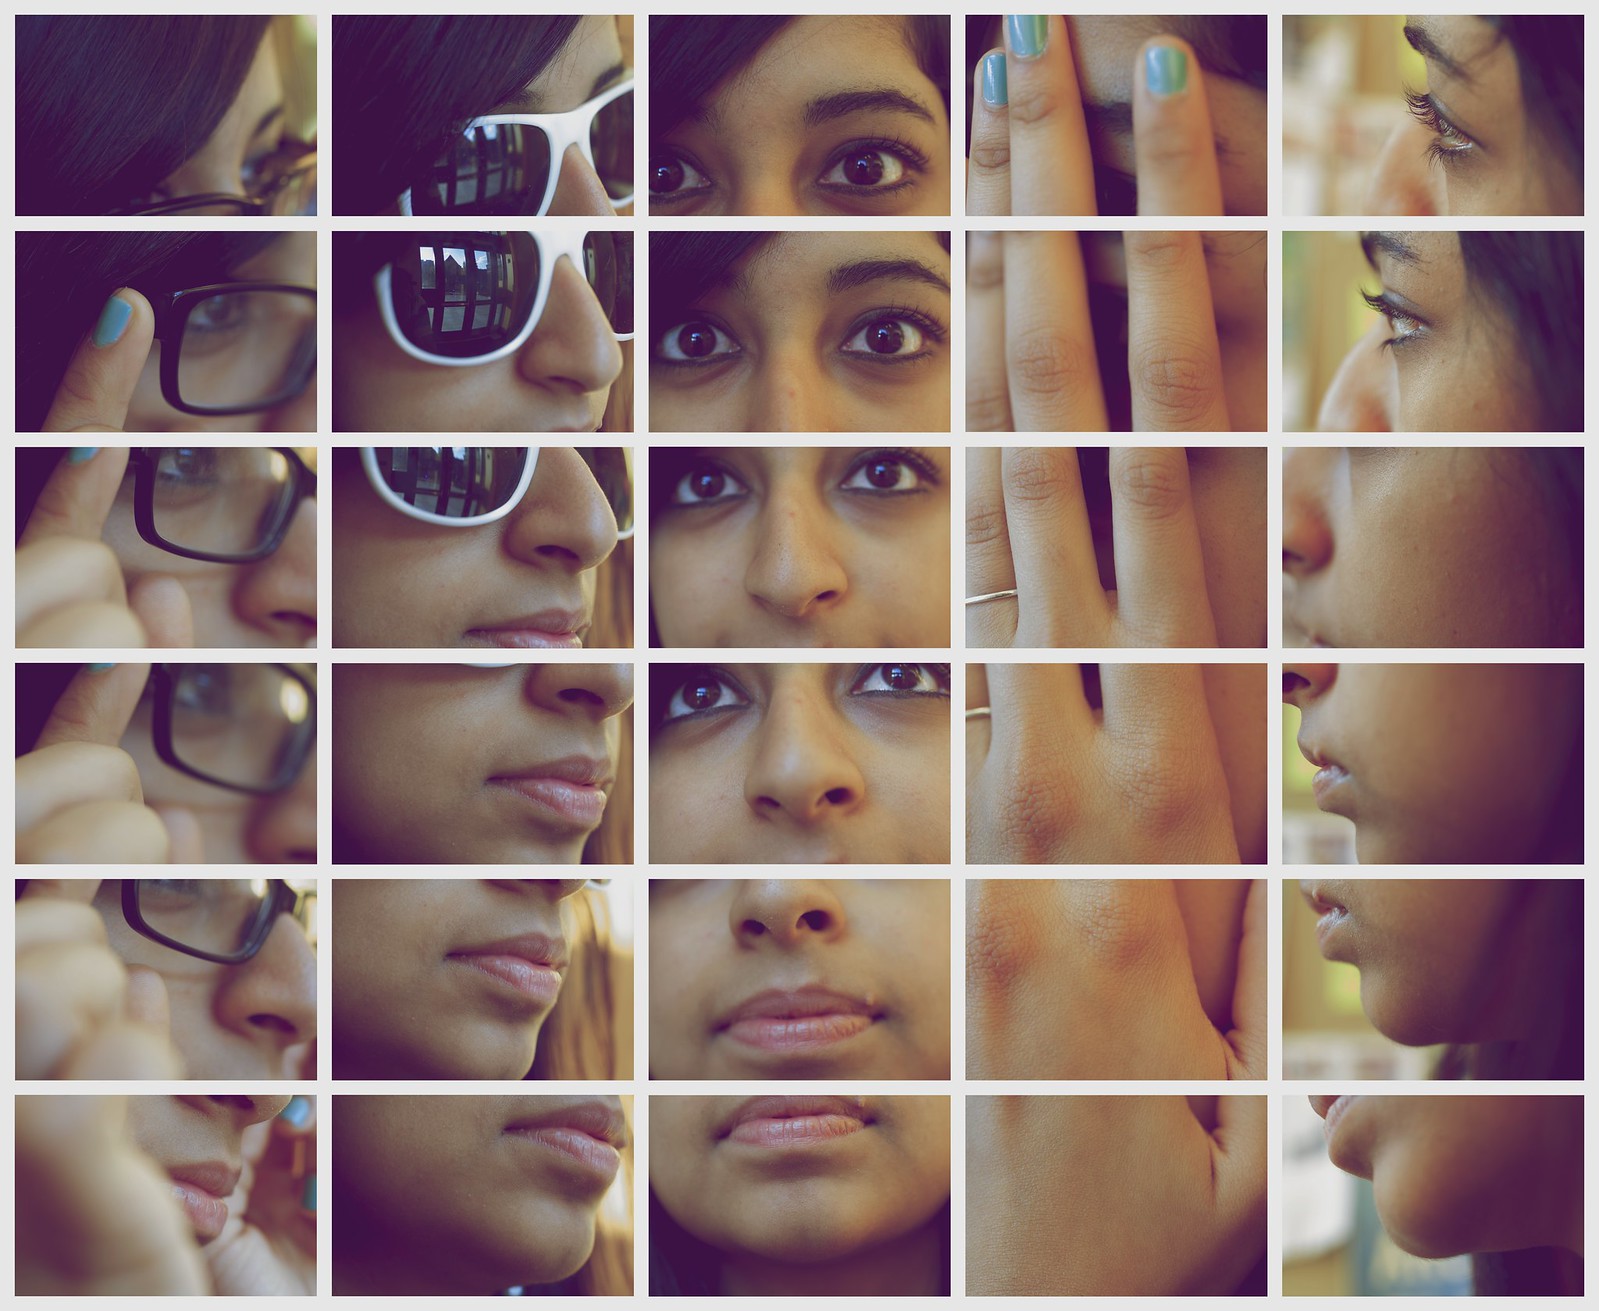
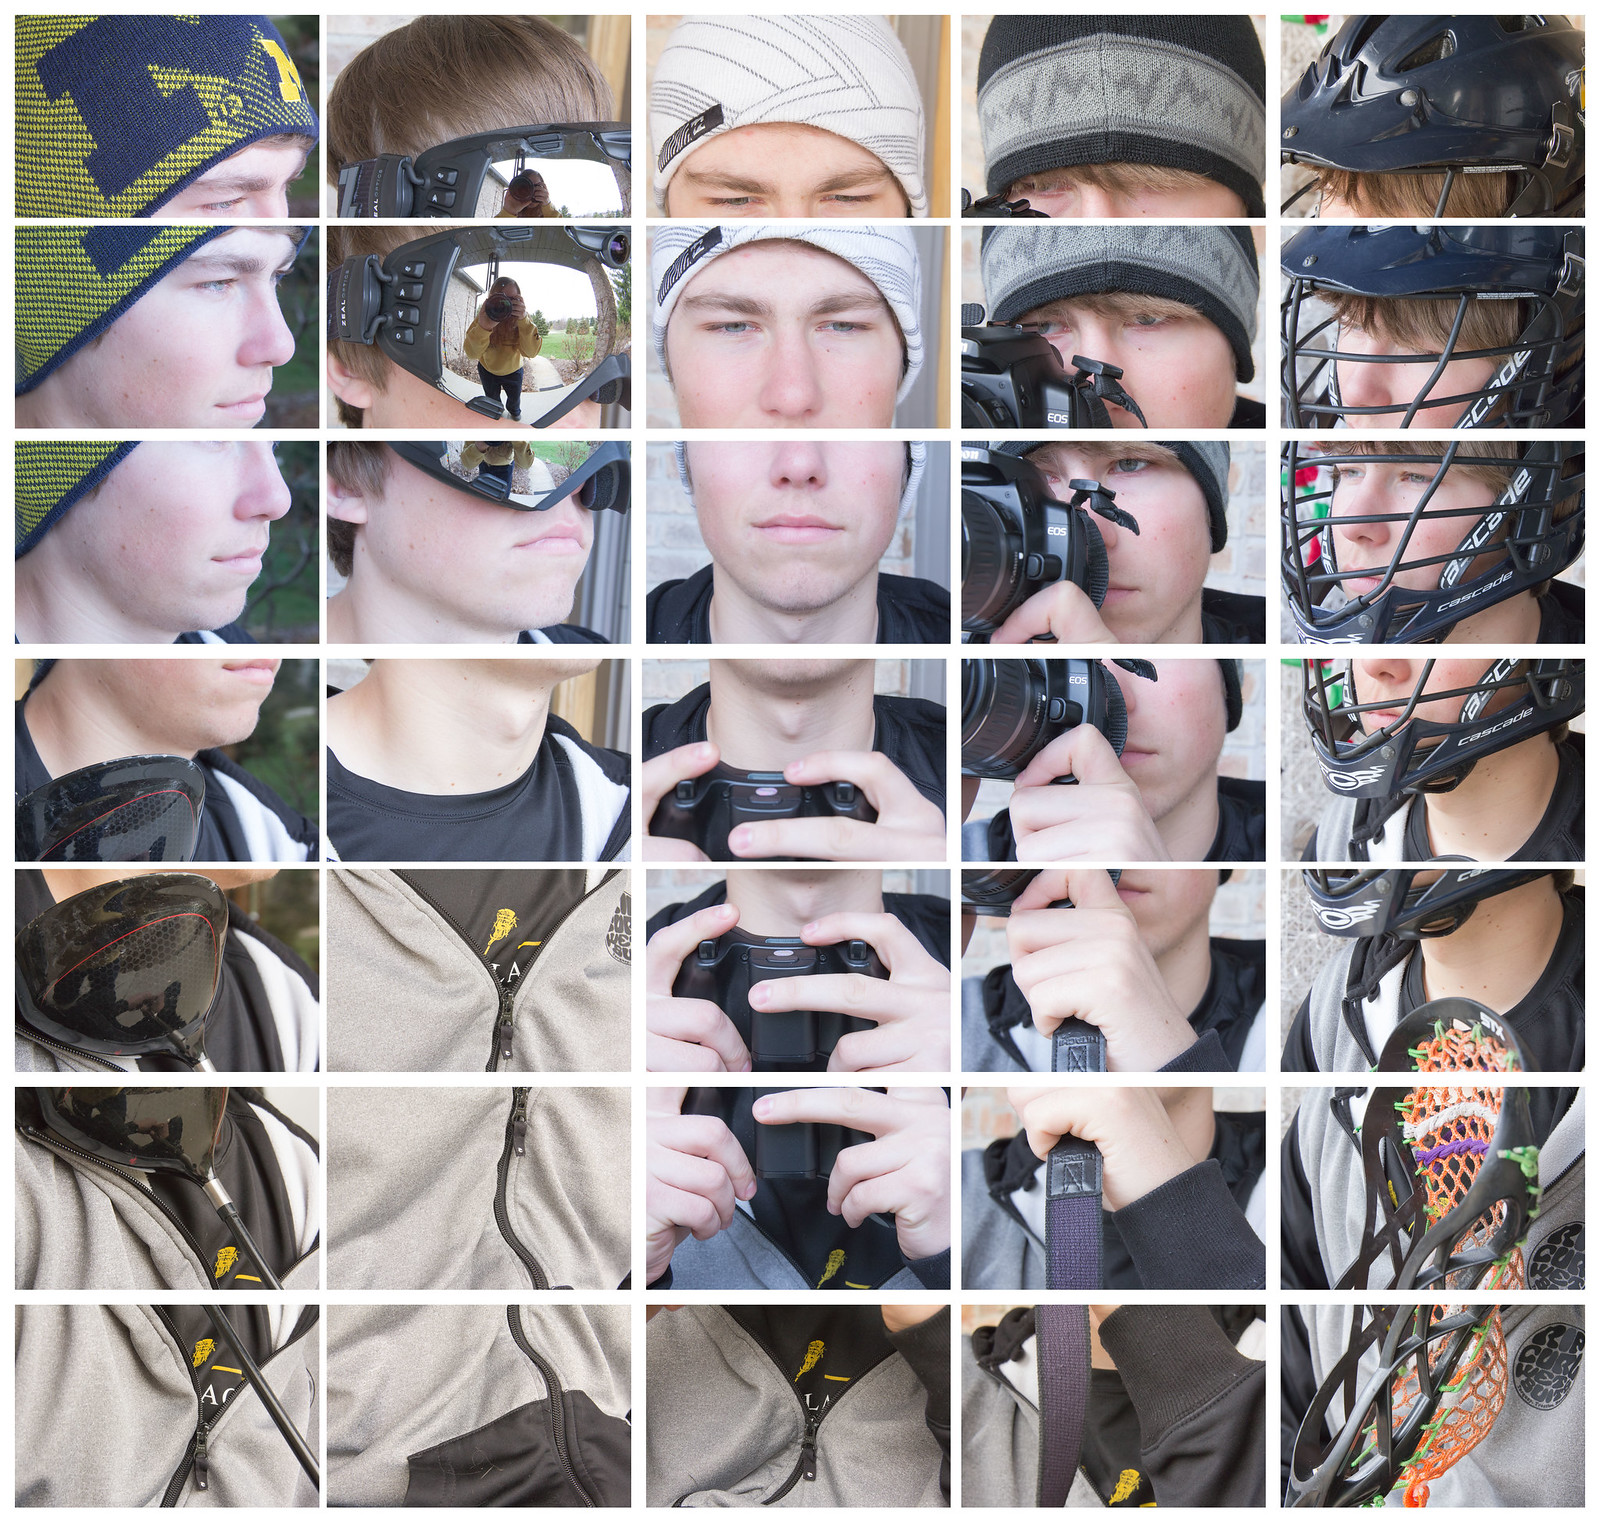
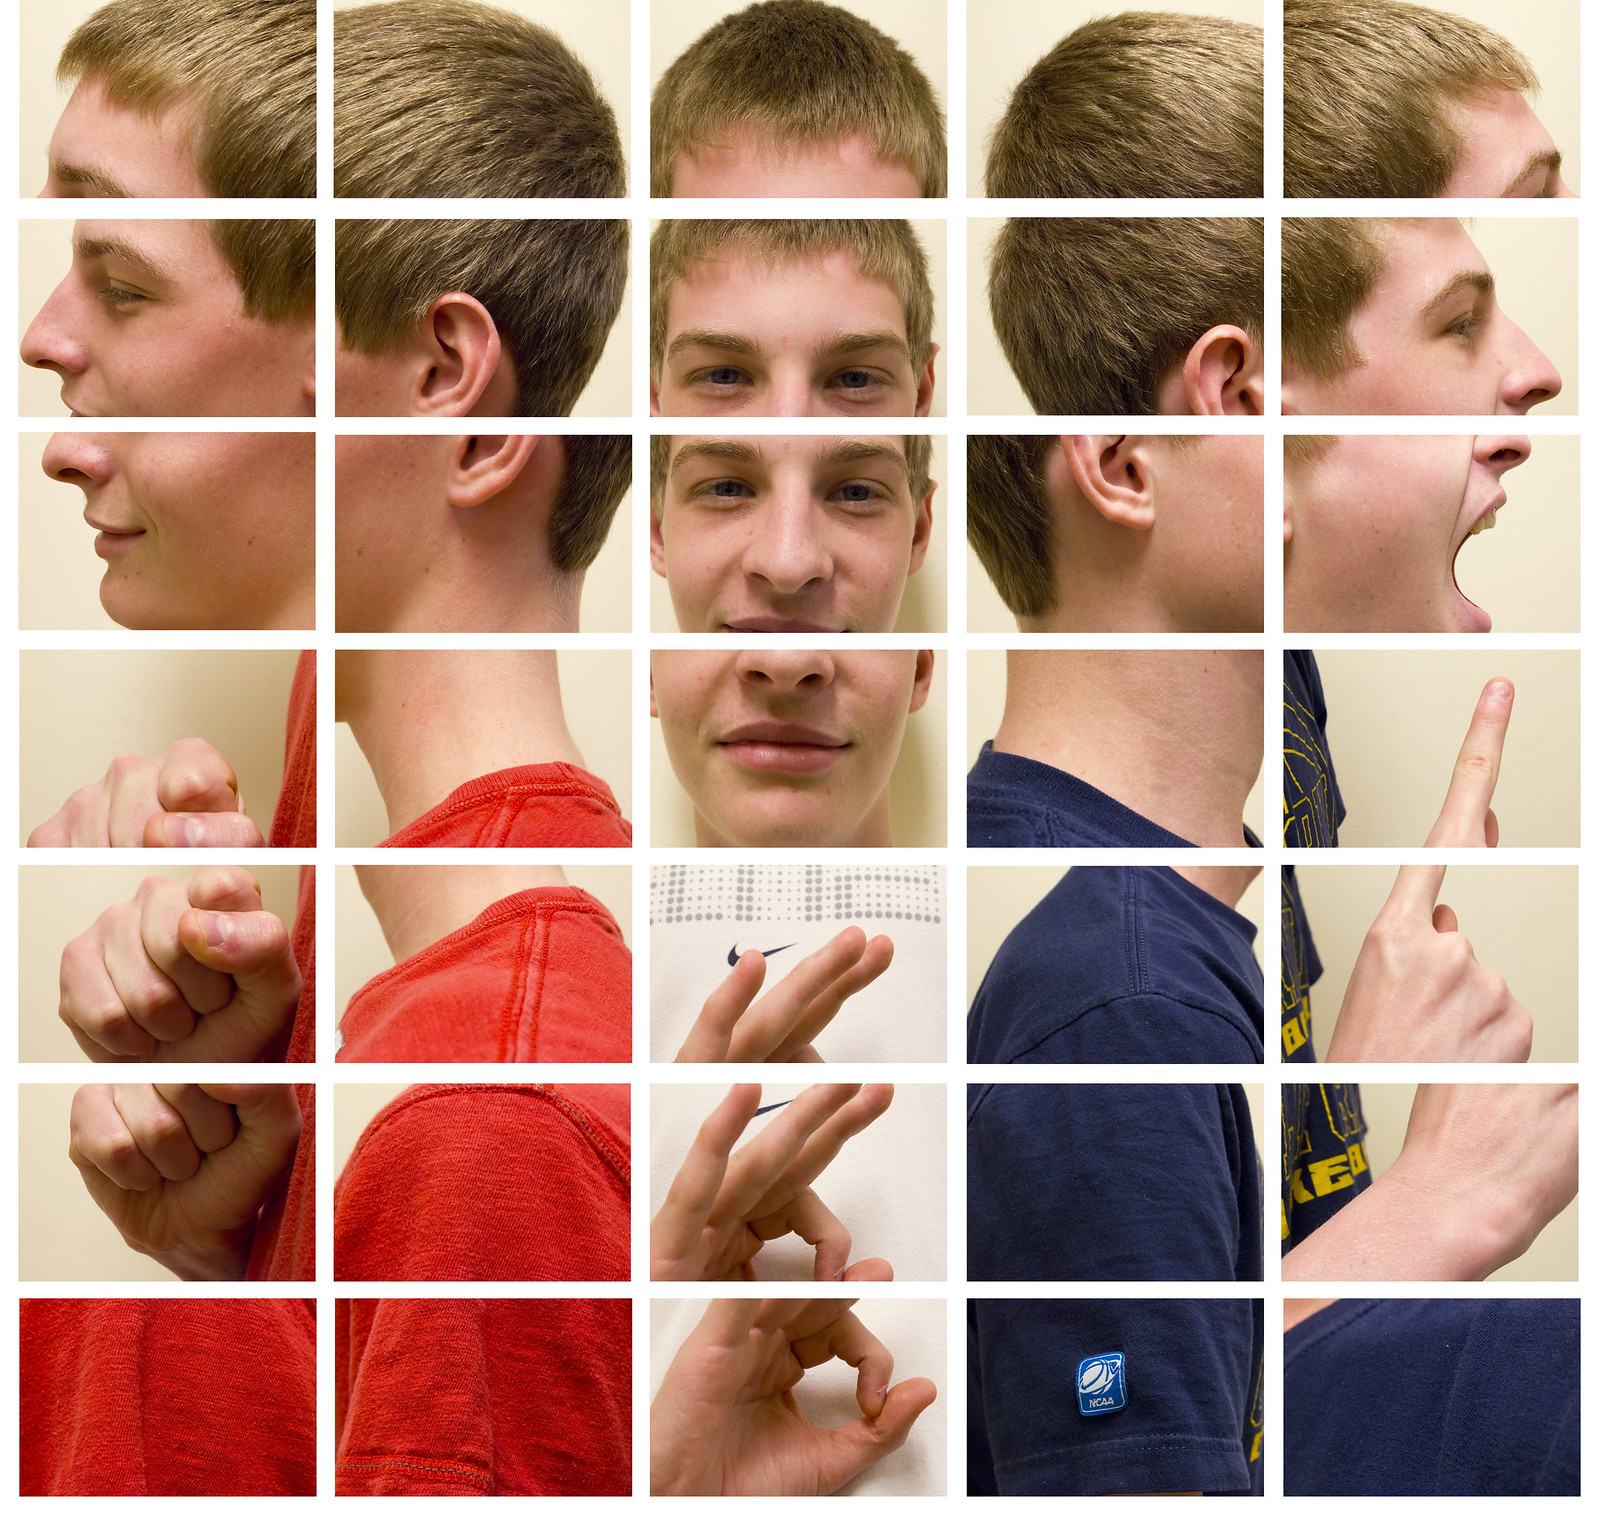
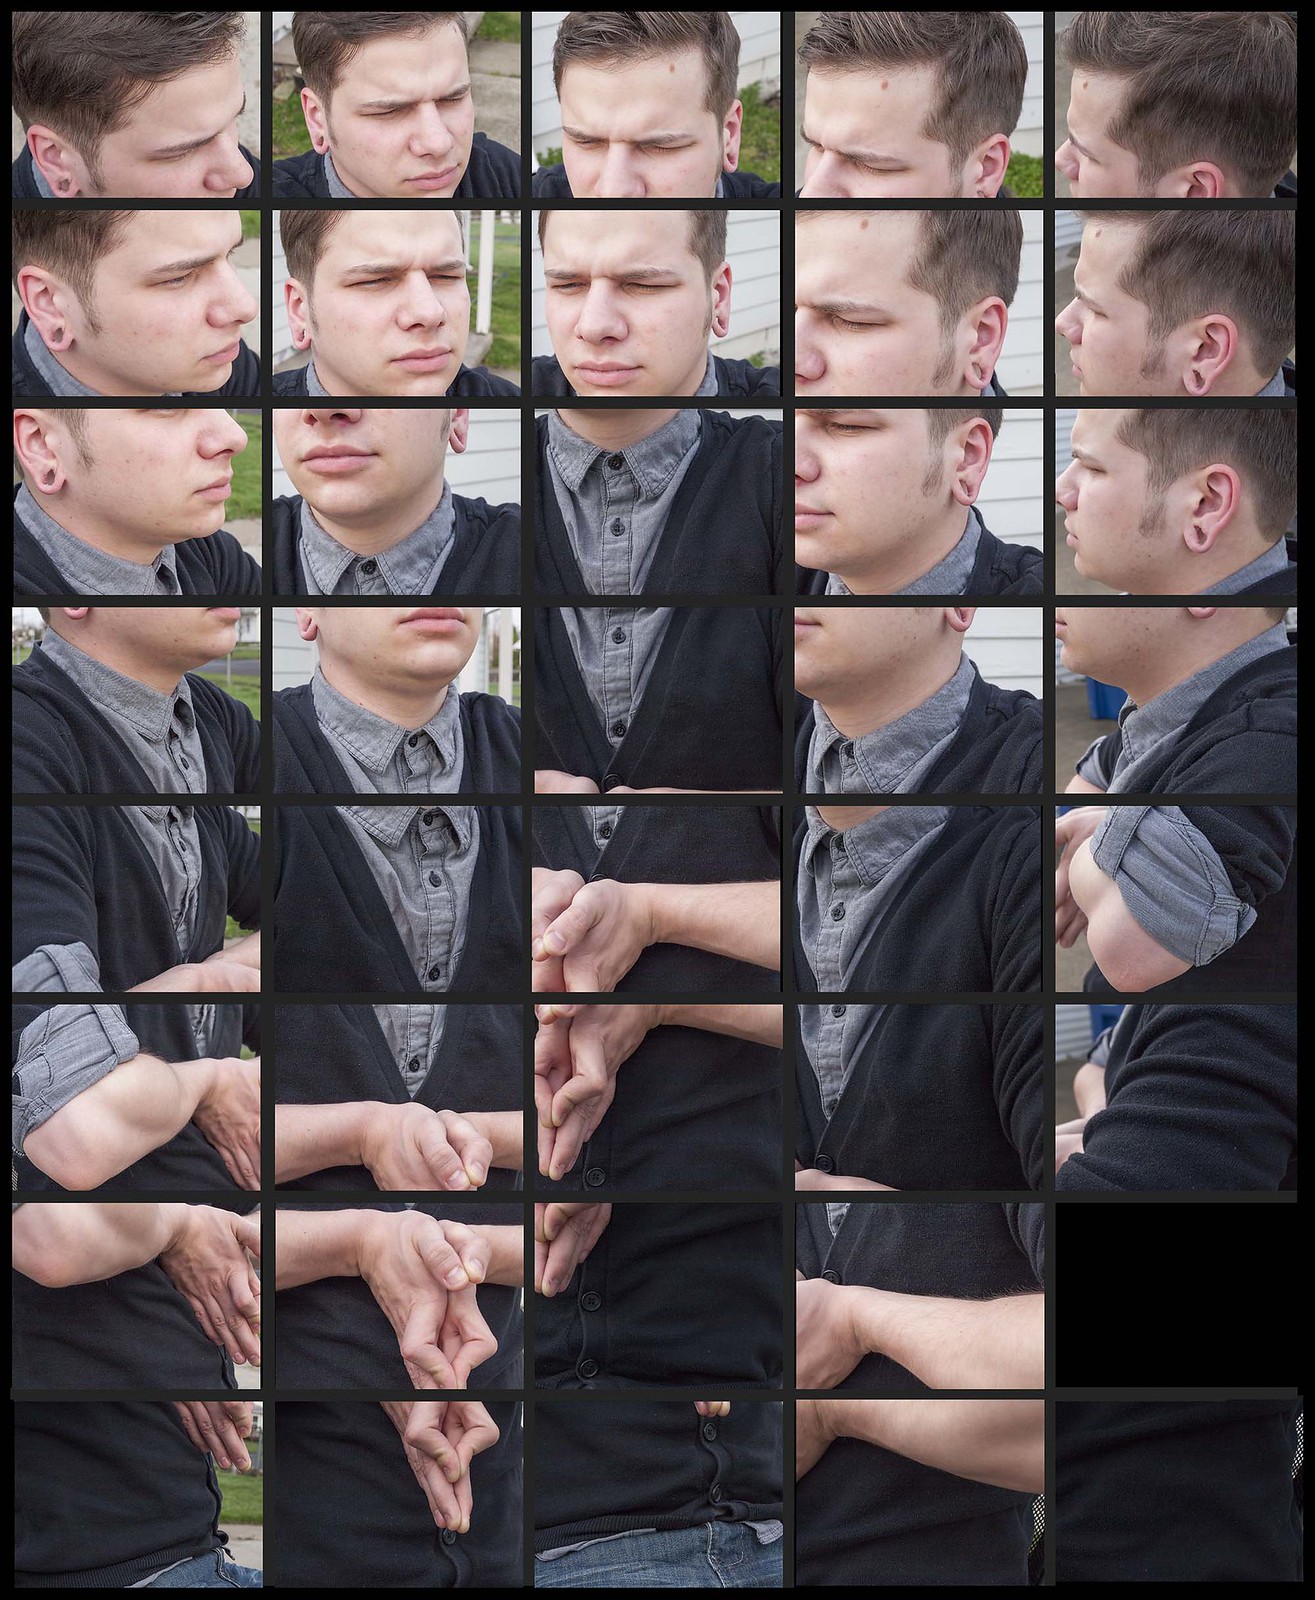
Try to show multiple facets of one's personality in this collaged piece. Consider half of it shot with one hair style, facial expression, clothes, makeup, whatever, and the other half of the images shot with a change of one of more of those elements. I wouldn't do exactly 1/2 and 1/2. Mix it up some. You may want to shoot 5x5 of both 'dress ups' and then choose which ones to combine later. You could do something like the image below but both sides would represent different facets of the same person's personality.
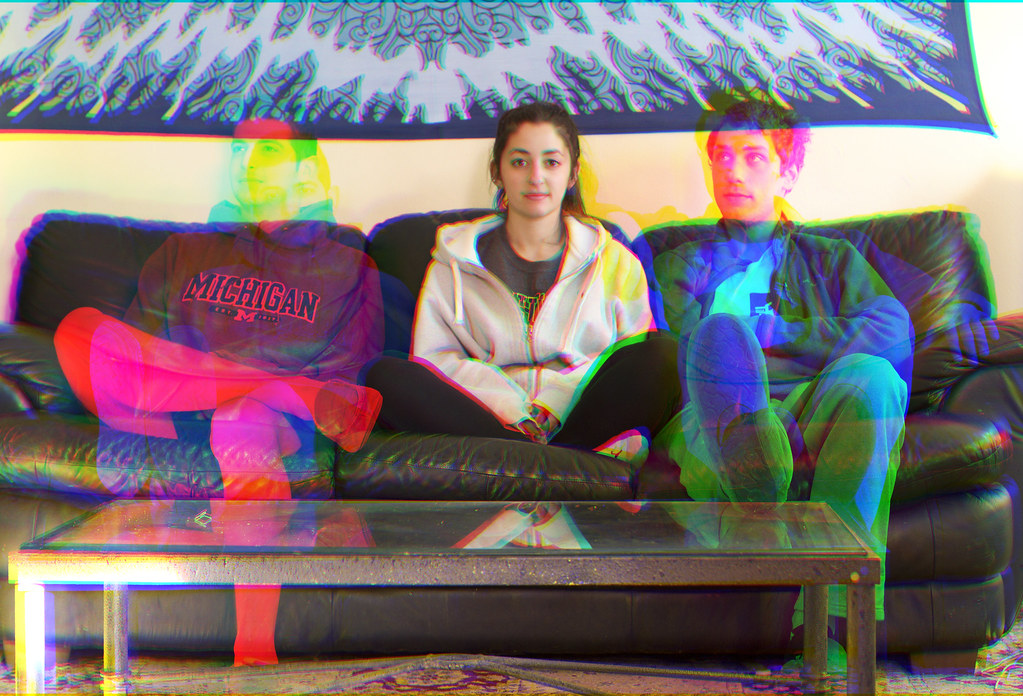
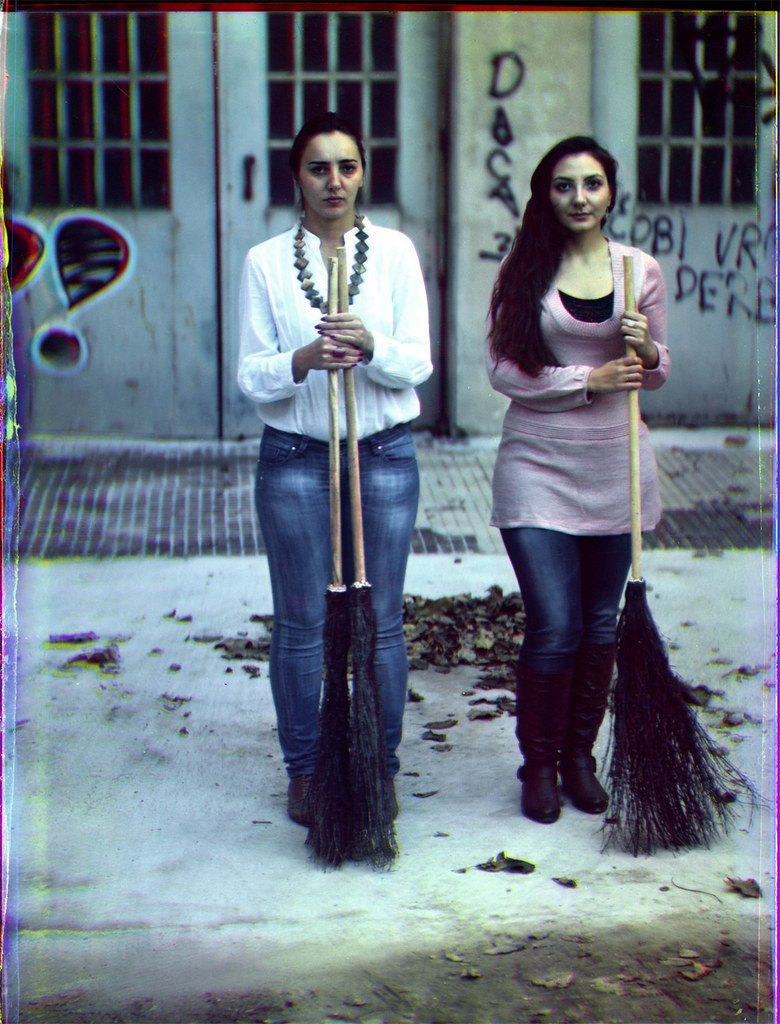
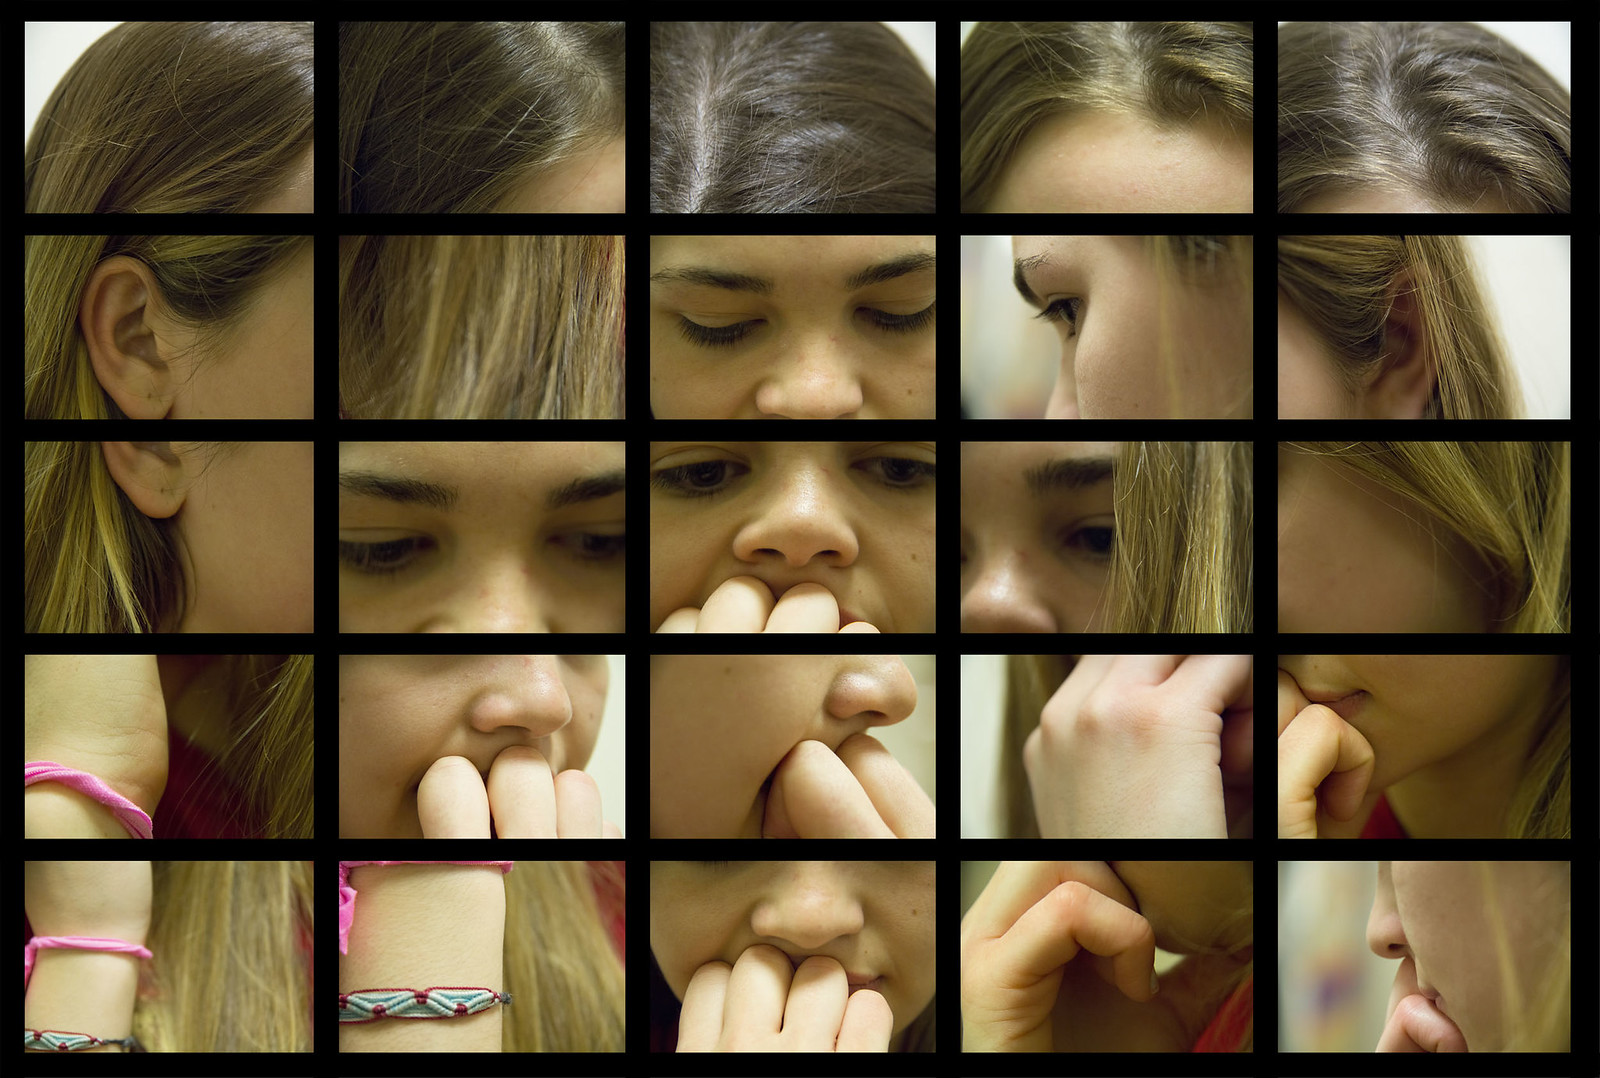
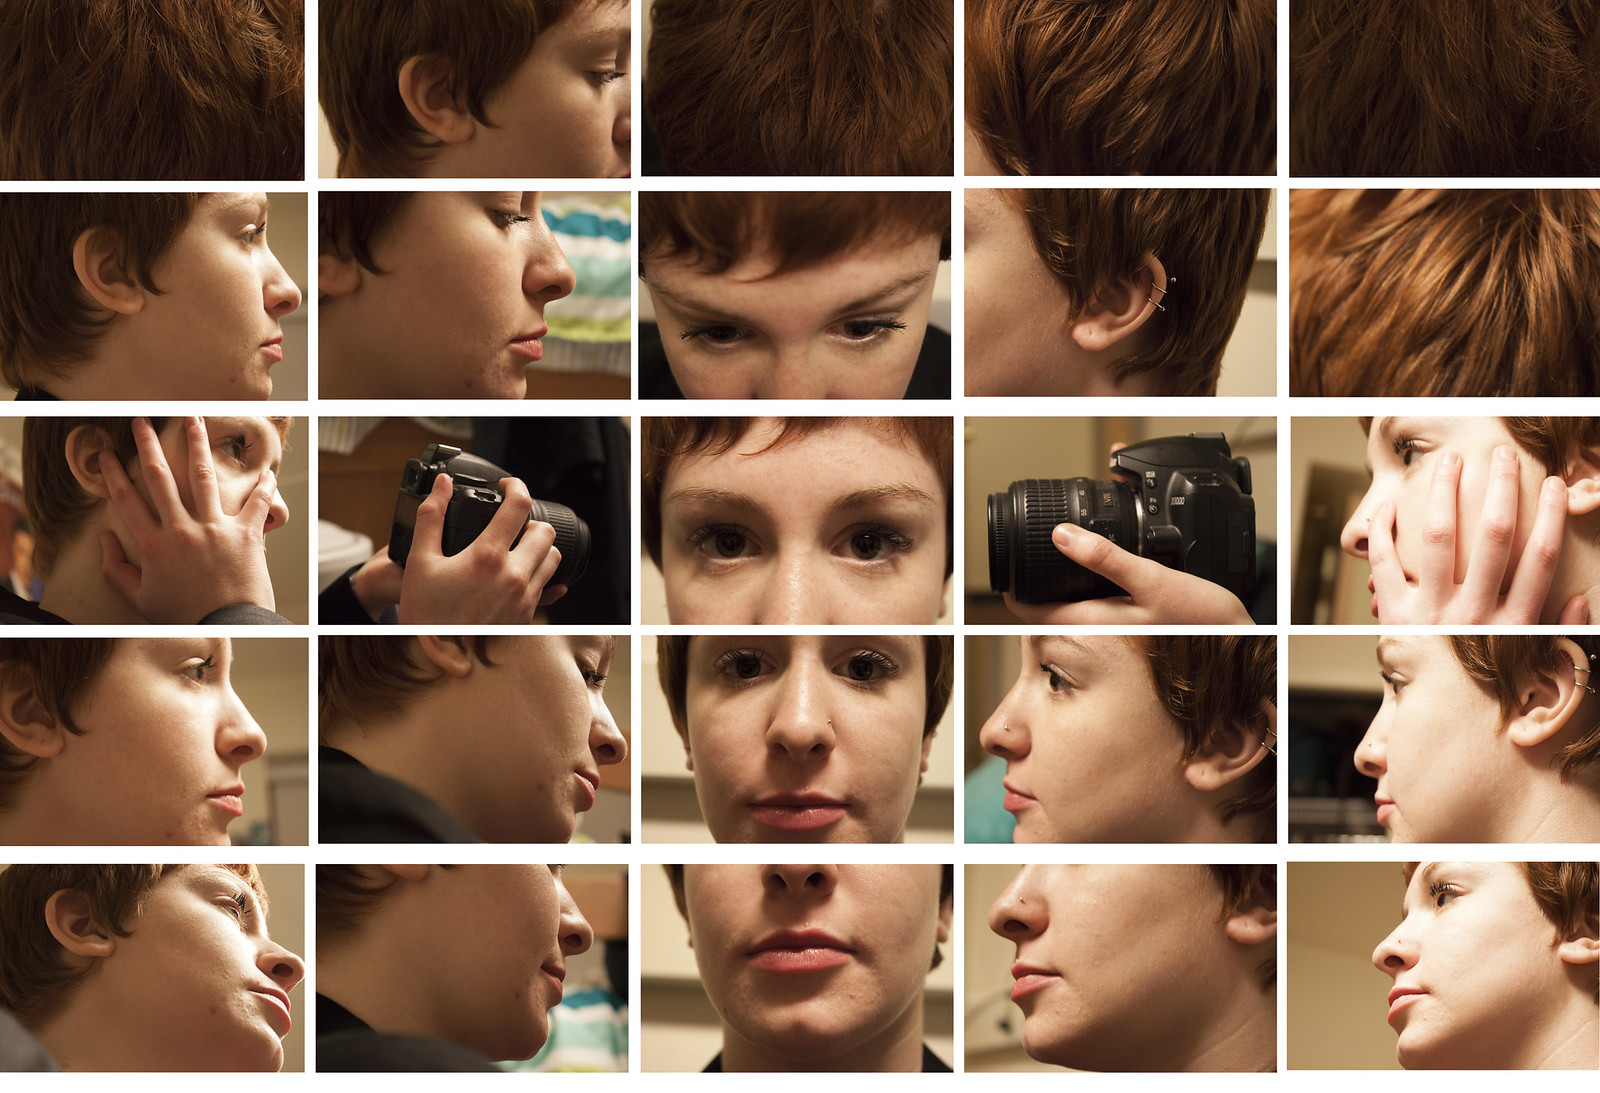
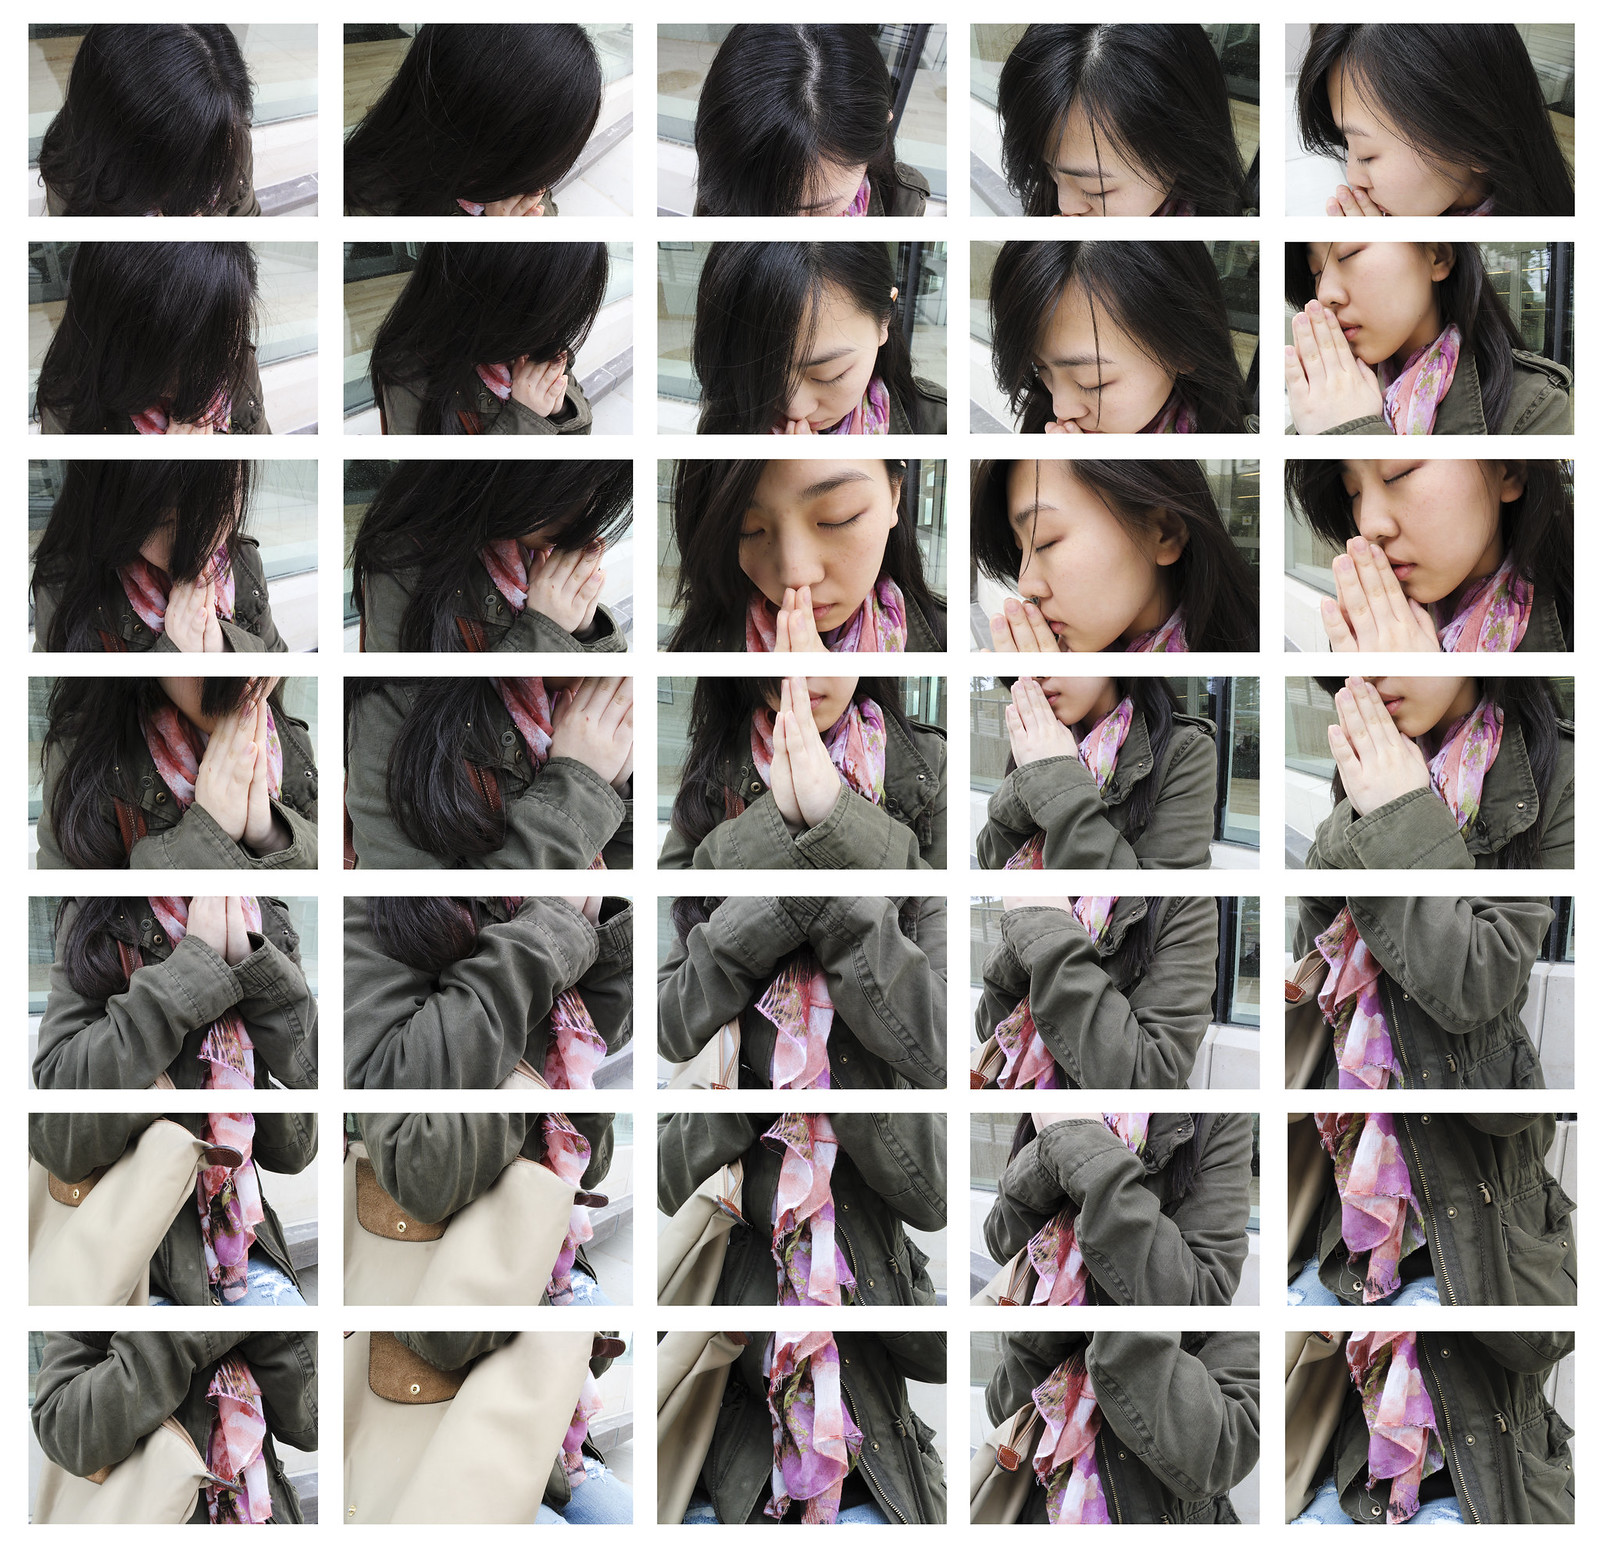
Or combine two people such as in the image immediately below.
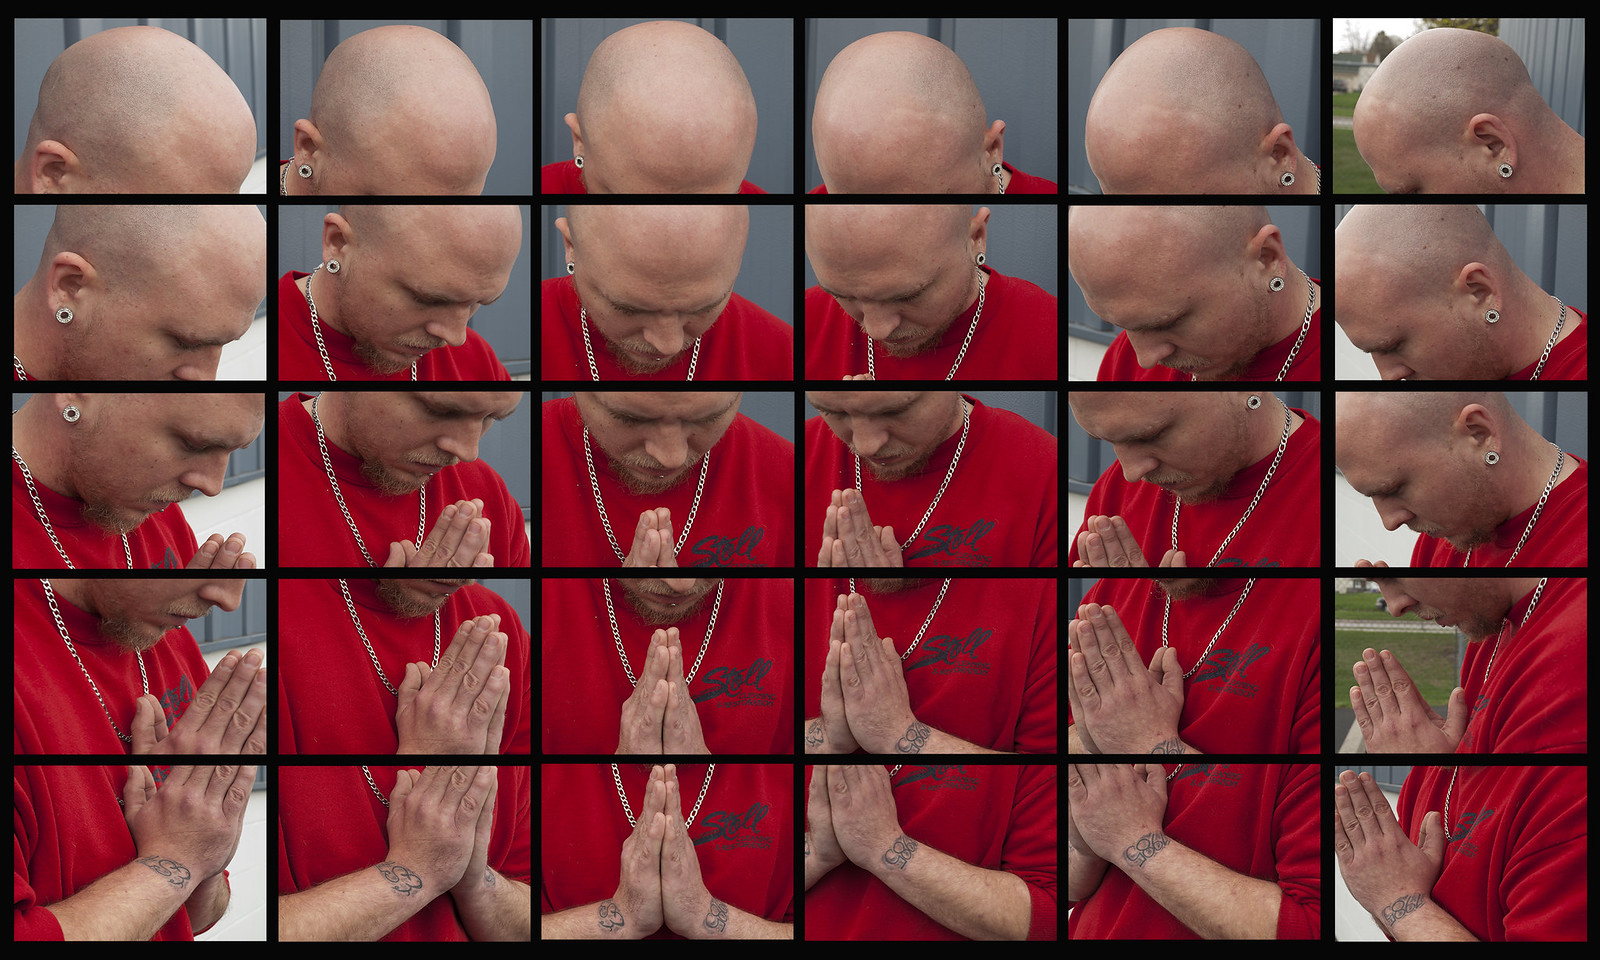


Next class we will go over how to fully assemble them and spend more time discussing resolution. So the quiz will only cover the following:  composition, focal length, and black and white conversion.


Student Examples

LHSP Students


UT Students

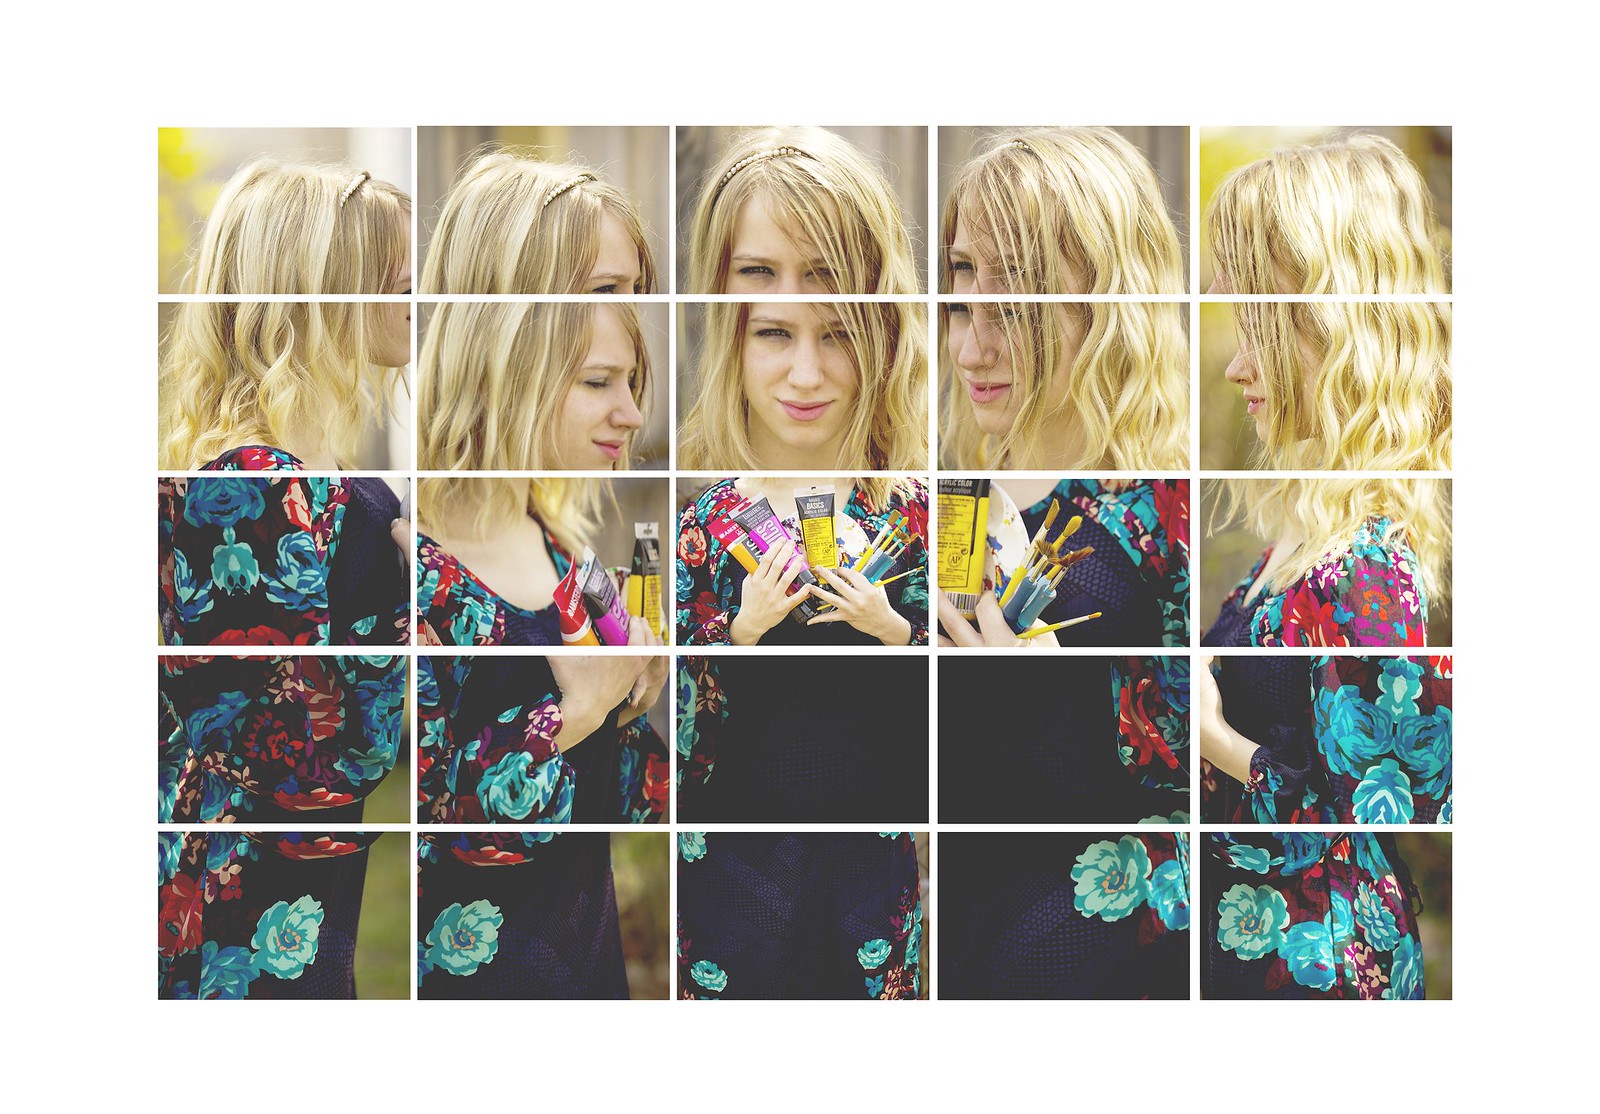
Series of Video Tutorials on how to assemble these images

I made a video series which covers the basics on how to assemble your image grid. I did it kind of fast, so the gaps in my resulting 'demo' image aren't perfect, but you will get the gist of it. You should be able to get perfect spacing on yours.

I will go through all this in class tonight (April 15 -tax day), but I made these to assist you assembling it outside of class if necessary. To re-cap, you just need the RAW images for class tonight - you don't need to attempt to assemble them as we will do that in class.

Video Part I

Video Part II

Video Part III

Video Part IV

Nice assortment of 'vintage look' actions

Blue Vintage filter that I used in the video. NOTE: It downloads as a .rar file and you have to have a program that can uncompress that. 7Zip is a free utility that opens and writes a number of compressed file formats included .rar. It is Windows only. Try RARExpander for Macs. Or just pick a different action that isn't saved as a .rar file!!


3x5 assemblage from Video with action applied

3x5 assemblage from Video without action applied

completed 5x11

complete 5x11 assemblage with selected action applied


Tuesday, March 18, 2014

Focal Length Technical Assignment #5 - due Tuesday

Two sets of photos: ALL IMAGES MUST BE EDITED TO THE BEST OF YOUR ABILITY. MAKE A SET FOR EACH ON FLICKR. THIS IS TECHNICAL ASSIGNMENT #5

All photos must be taken off campus. The exceptions being the Arboritium and the Matthei Botanical Gardens (which are really very nice and worth the short trip). 

All photos must be edited to the best of your ability. White balance, tone, etc.

1. Take a set of photos of three objects. A foreground, middle ground, and background. Set the camera up on tripod. Take an image at your longest, shortest, and middle of the road focal lengths. Don't move the camera at all between the shots. Use the same exposure for all the shots.
This image illustrates the idea of what you are trying to do.   
Another example. 

2. Select a subject. Take an image at your longest, shortest, and middle of the road focal lengths. Move the camera as necessary to keep the foreground subject the same size. A friend works well as a subject. Note how the apparent distance between foreground and background elements seems to change.Use the same exposure for all the shots.
Here is a nice example of what you are trying to do. 
Here is another nice example of what you are trying to do. 
Here is yet another example.  

3. Ten creative photos which not only demonstrate an understanding of focal length but good composition as well. They should all be distinct.

Other links you might find useful/interesting:
Effect of focal length and DoF
Illustration of the effect of changed perspective in combination with change in focal length
Series of portraits taken using different focal lengths and perspectives.


Composition


You should read this by March 18th.

The Art of Black and White Photography: Techniques for Creating Superb Images in a Digital Workflow, read Part III: Rules of Composition. The whole thing.


A really great Kodak presentation on photo composition made in the late 1970s. I love this presentation. I have it on slide and audio cassette; easier to show this way.

Kodak Guidelines for Better Photographic Composition - this is an old Kodak guide to photo composition that someone scanned and transcribed. The images still hold up. It is a newer version of the other presentation.

Kodak Guide to Better Pictures: Composition - simplistic, but there is still some good information and images here.

Trichromy - student work Winter 2014

Marlee

Emma


Rachael


Kip


Noah


Celeste


Robbie


Courtney


Nikki


Tuesday, March 11, 2014

Class Trichromy Photos


Preferred iPhone Apps

Photogene $2.99
PhotoForge - no longer available ;-(

Free!!!
SnapSeed
PS Express


Trichromy - Color from Black and White

Two unique images should be in a Flickr set by Tuesday. Nothing that you shot as part of our in class demos will be accepted. Go crazy with this assignment!


Article translated into English using Google Translate

One clever aspect of some of his images are that he isn't using a tripod, so the images are a little bit off as well which results in color fringing throughout the image. He could easily 'register' the images in an image editor, but I assume he likes the look (so do I).


Below is a really nice use of the process. Image is by Flickr user Budzillab.
Below is an image by a friend of mine named Branna.


Even though this assignment is based on a technical/creative technique, I still want them to be great images. Please take some time and make a really strong image.

Below, is an image that I photographed and assembled as a demonstration for the class pictured.


Background
Some of the earliest color photos were taken and exhibited before the advent of color film materials. Prokudin-Gorskii was one such photographer. The Library of Congress has an excellent website dedicated to his work which explains the process that he used. Eseentially, he would take one photo for the Red light, one for the Blue, and one for the Green using black and white film. Then he would project the resulting images from three different projectors one each for Red, Green, and Blue. This would reconstitute a full color image. This is not to dissimilar from how most digital cameras record color (more on that at another time).

Trichromy via Multiple RGB Exposures
You can get a similar effect by taking three separate exposures on the same piece of color film using a red, green, and blue (the primary additive colors) filters respectively. If you are shooting digitally, you can achieve the same effect by taking one channel from each image (red, green, blue) and combining them into a new image. The trick is that have to use a tripod to take three photos of a scene in which part of it has movement and part of it does not (or not depending on the look that you want). The trick is that you have to pre-visualize how the resulting image will look once composited.

How to combine the channels into one composite image
In order to combine them into one as shown above, you first edit one of them using Camera Raw (assumes you captured your images as RAW files). Then synchronize all three images. Then take one of the images, select the Red channel, right click it, select Duplicate Channel, Create New, name it Red. The basically do the same for the other two channels, taking the Green from one image and the Blue from another. These new images will be in a weird Multichannel Mode. Go to Image > Mode and change the mode to Grayscale for each of them. Save each of the three files to the same directory as TIFFs (I don't think that you have to do this, but it is a good idea should something go wrong). Then, go to one of the grayscale files, let's say Red. Make sure the other files are also open so you should have three files open now, one named Red, one named Green, and one named Blue. Select one of the images. Go to the Channels Palette. Hit the little hidden menu icon in the corner to revel the drop down menu. Select Merge Channels. Then select RGB Mode. Make sure it is set to 3 colors. Then hit OK. It should automatically list the three channels that will make up the color version. Make sure all 3 channels are indicated in the correct order. This will then give you full color image. Are that didn't move should look normal and those parts that moved will have different colors to them.
NOTE: You will get a slightly different look by changing the images from which you took the respective primary color from. That is to say, you can take the Red, Green, and Blue channels from a different one of the original color images. This will result in the colors being different.
NOTE: All 3 images must be the EXACT same size. That is to say they must have the exact same pixel dimensions.

Putting together a Trichromy image using GIMP

Similar thread about free programs that can do this...

Here is a tutorial which pretty much ends up with the same results, but goes about it differently. The article refers it as being a Harris Shutter Effect. This process is really more like early color photography than a Harris Shutter as it requires three exposures; one through each of the primary additive colors: Red, Green, and Blue. A Harris shutter is used during a single exposure. It's goal isn't to create a normal looking image, rather to create a full color image with some funky color fringing. Here is a write up on creating a real Harris Shutter.

Article about how NASA takes photos of the earth. Particularly timely as we just discussed how to build up a color image from black and white photos.

Flickr Thrichromy Group

Have fun with this assignment!

Student Examples


Cell phone image